Hello! I’m Dr. Jeanette Laredo (@jeandotnet). It’s another year, which means another chair project for spiderweb salon & friends!
This is a community art project where all artists and supporters of spiderweb salon were invited to help build our entry for Denton’s 2025 Scary Chairy Orchard. So take a gander at the lore and build for our goose chair below:
The Lore
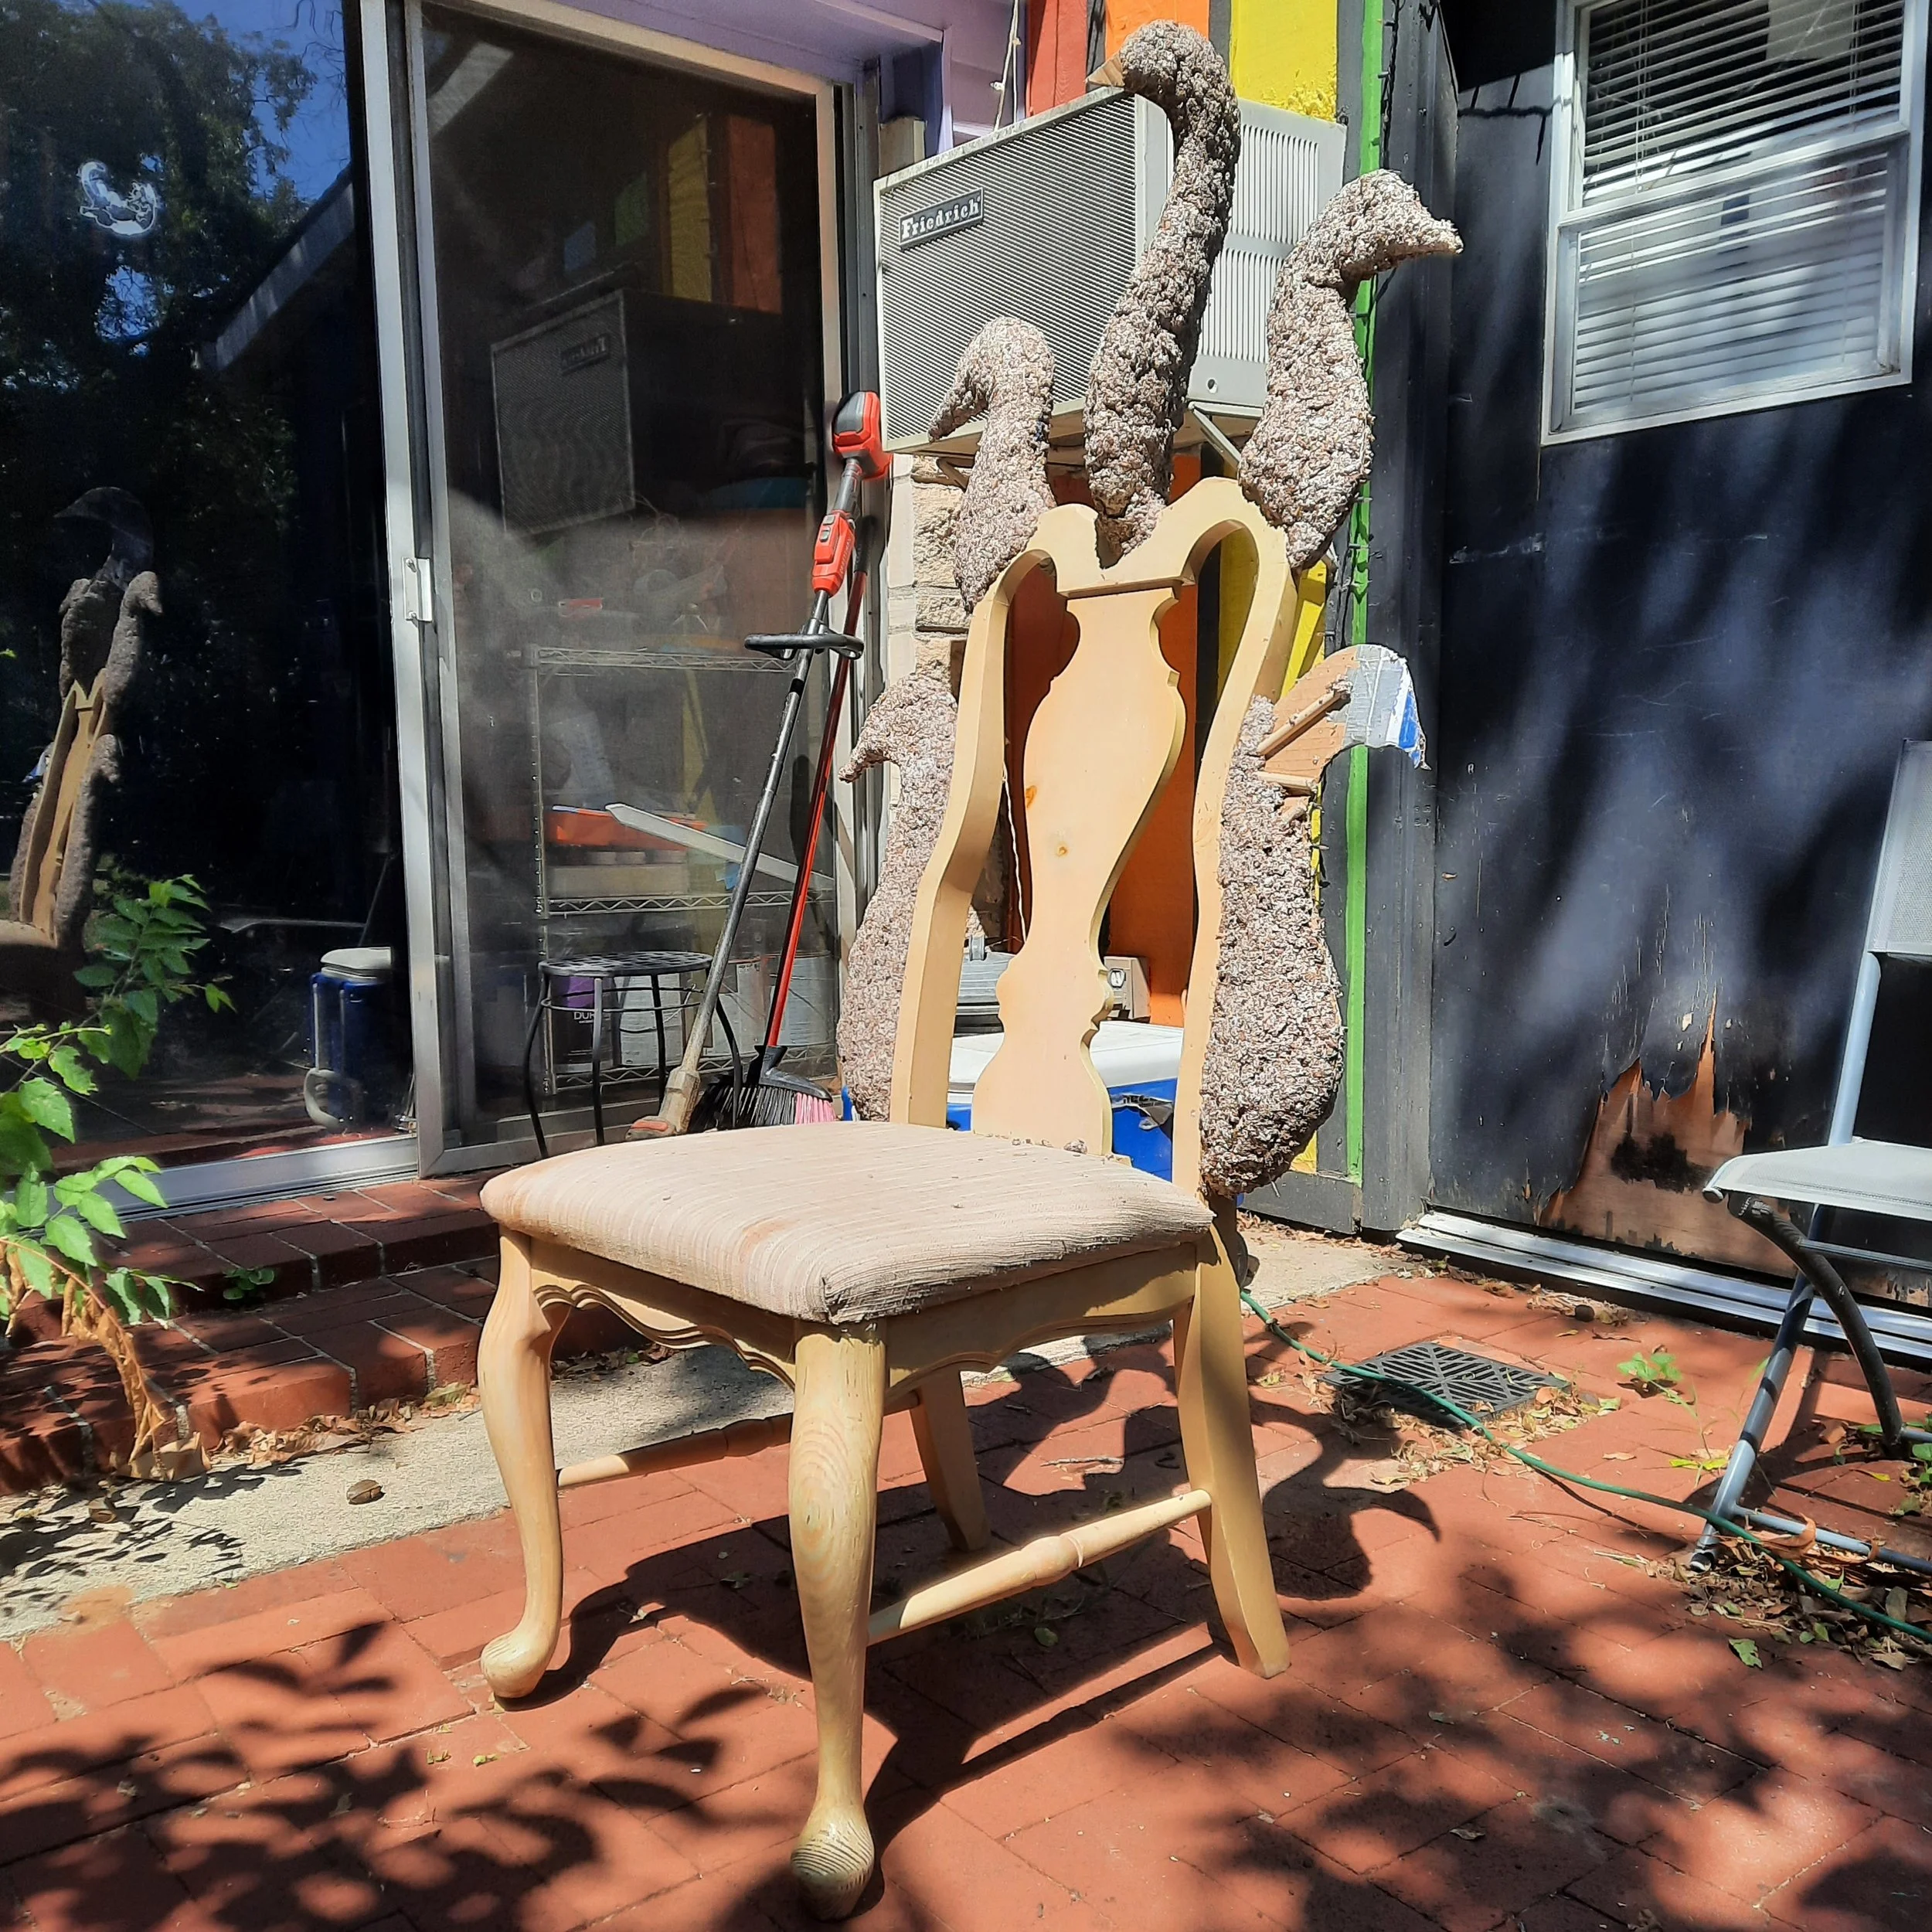
The inspiration for the chair came from Megoosa, a version of Medusa with geese for hair instead of snakes, but the narrative shifted as we started to work together to make the goose a reality!
The final result is a chair made up of a variety of birds who come together to fight a great and terrible evil that threatens their environment:
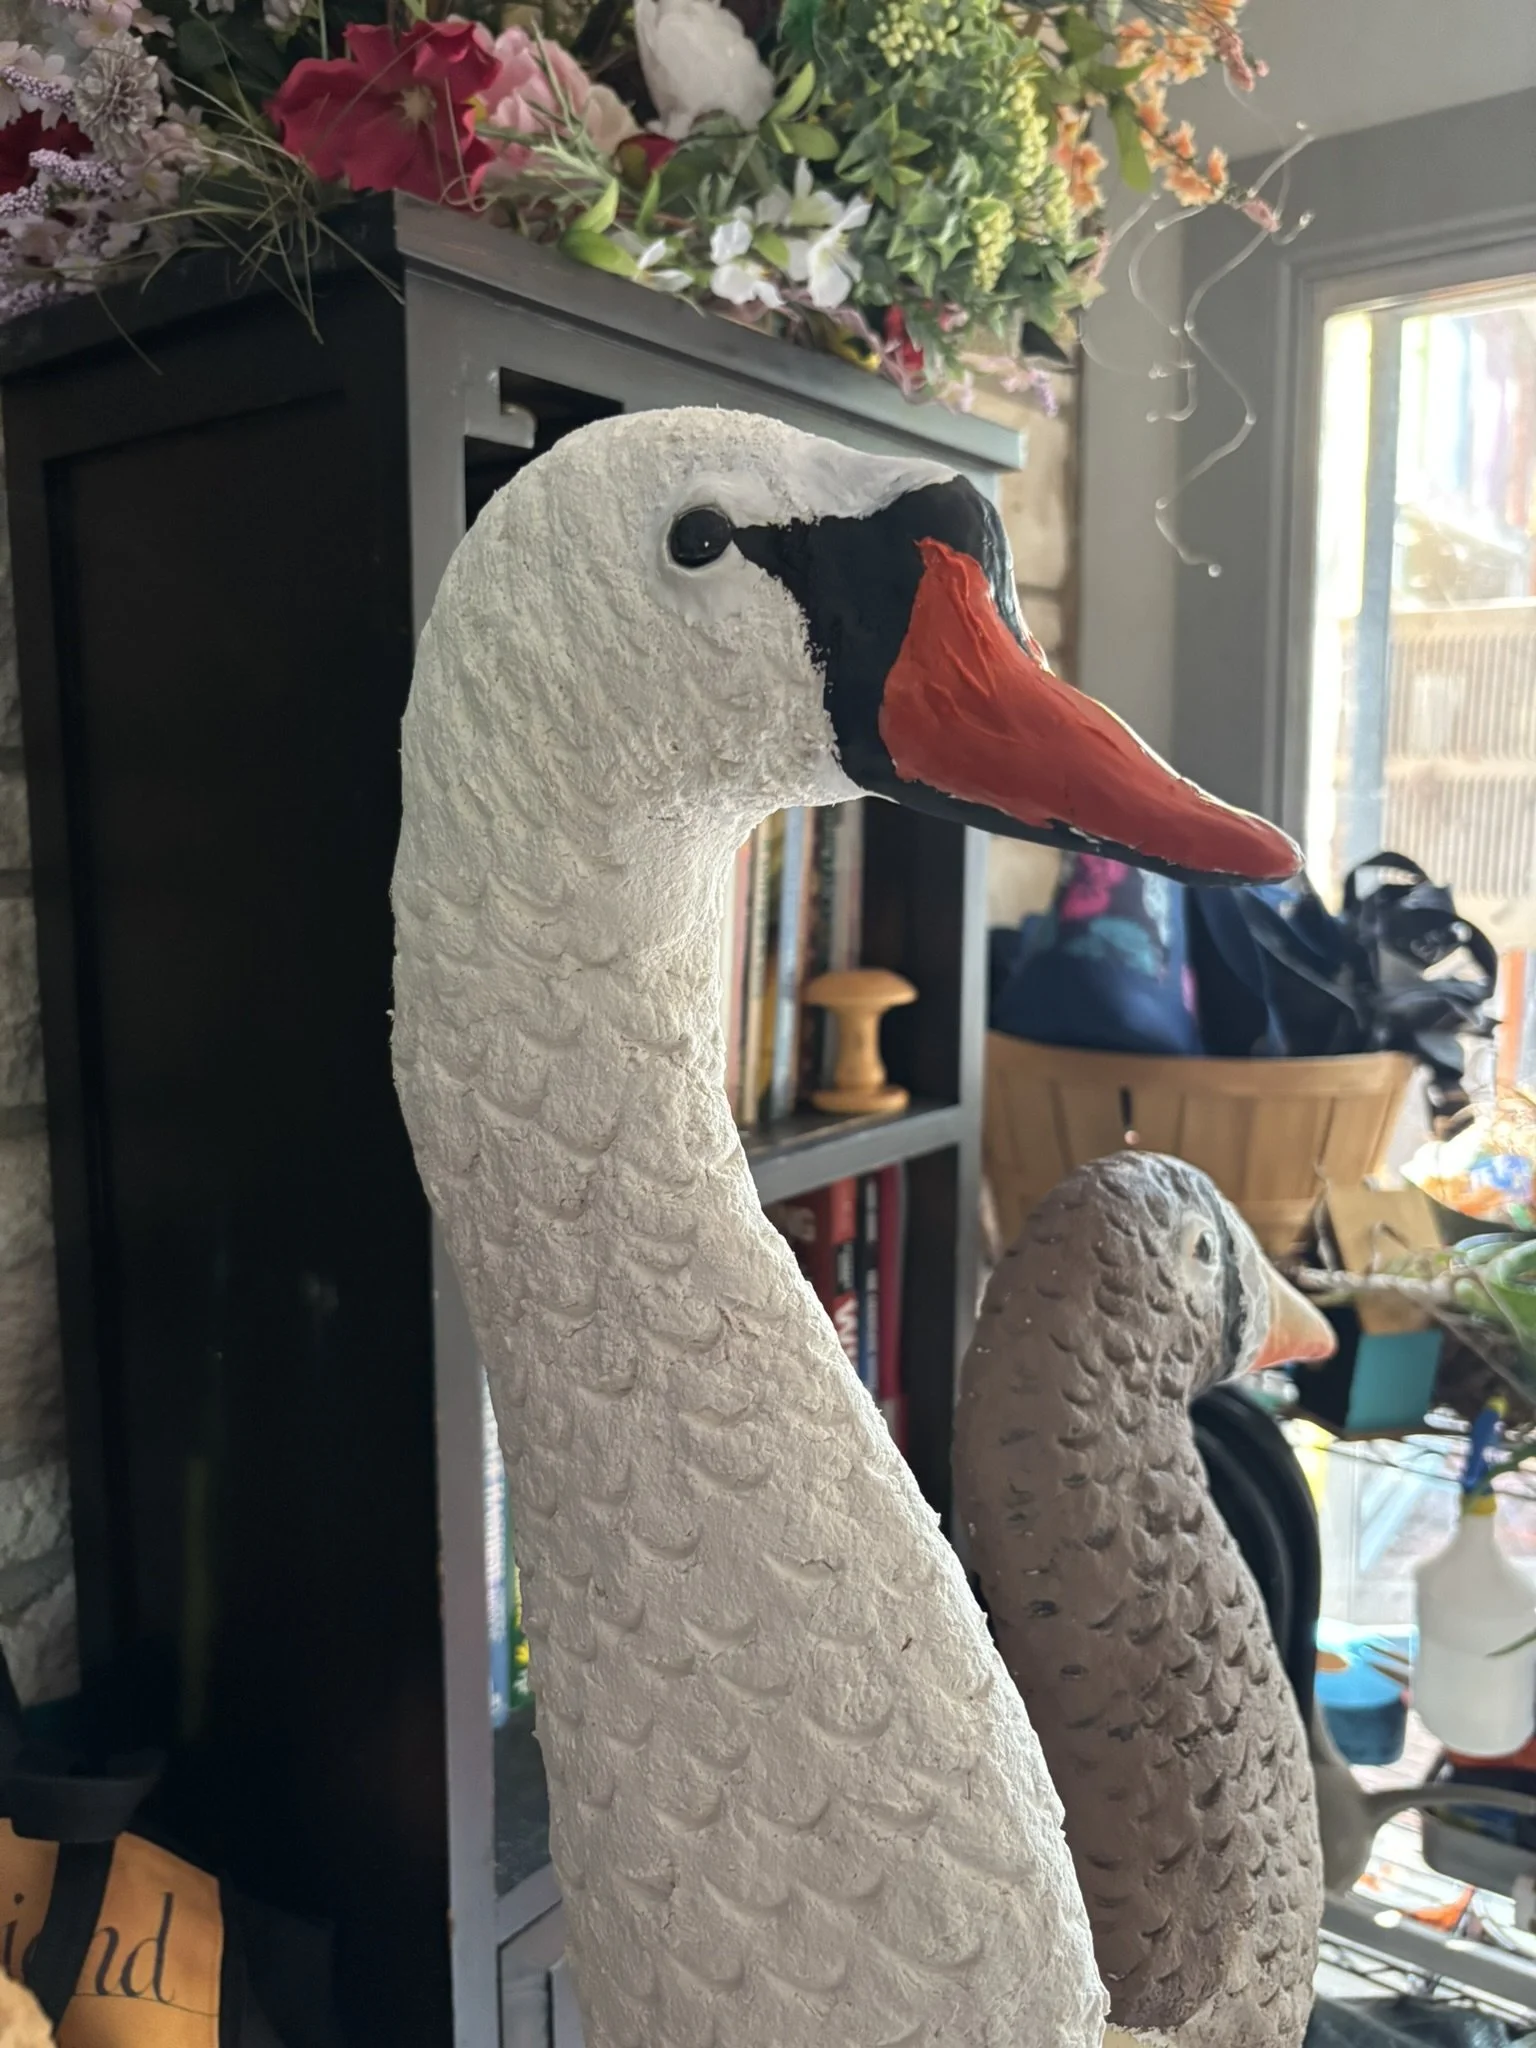
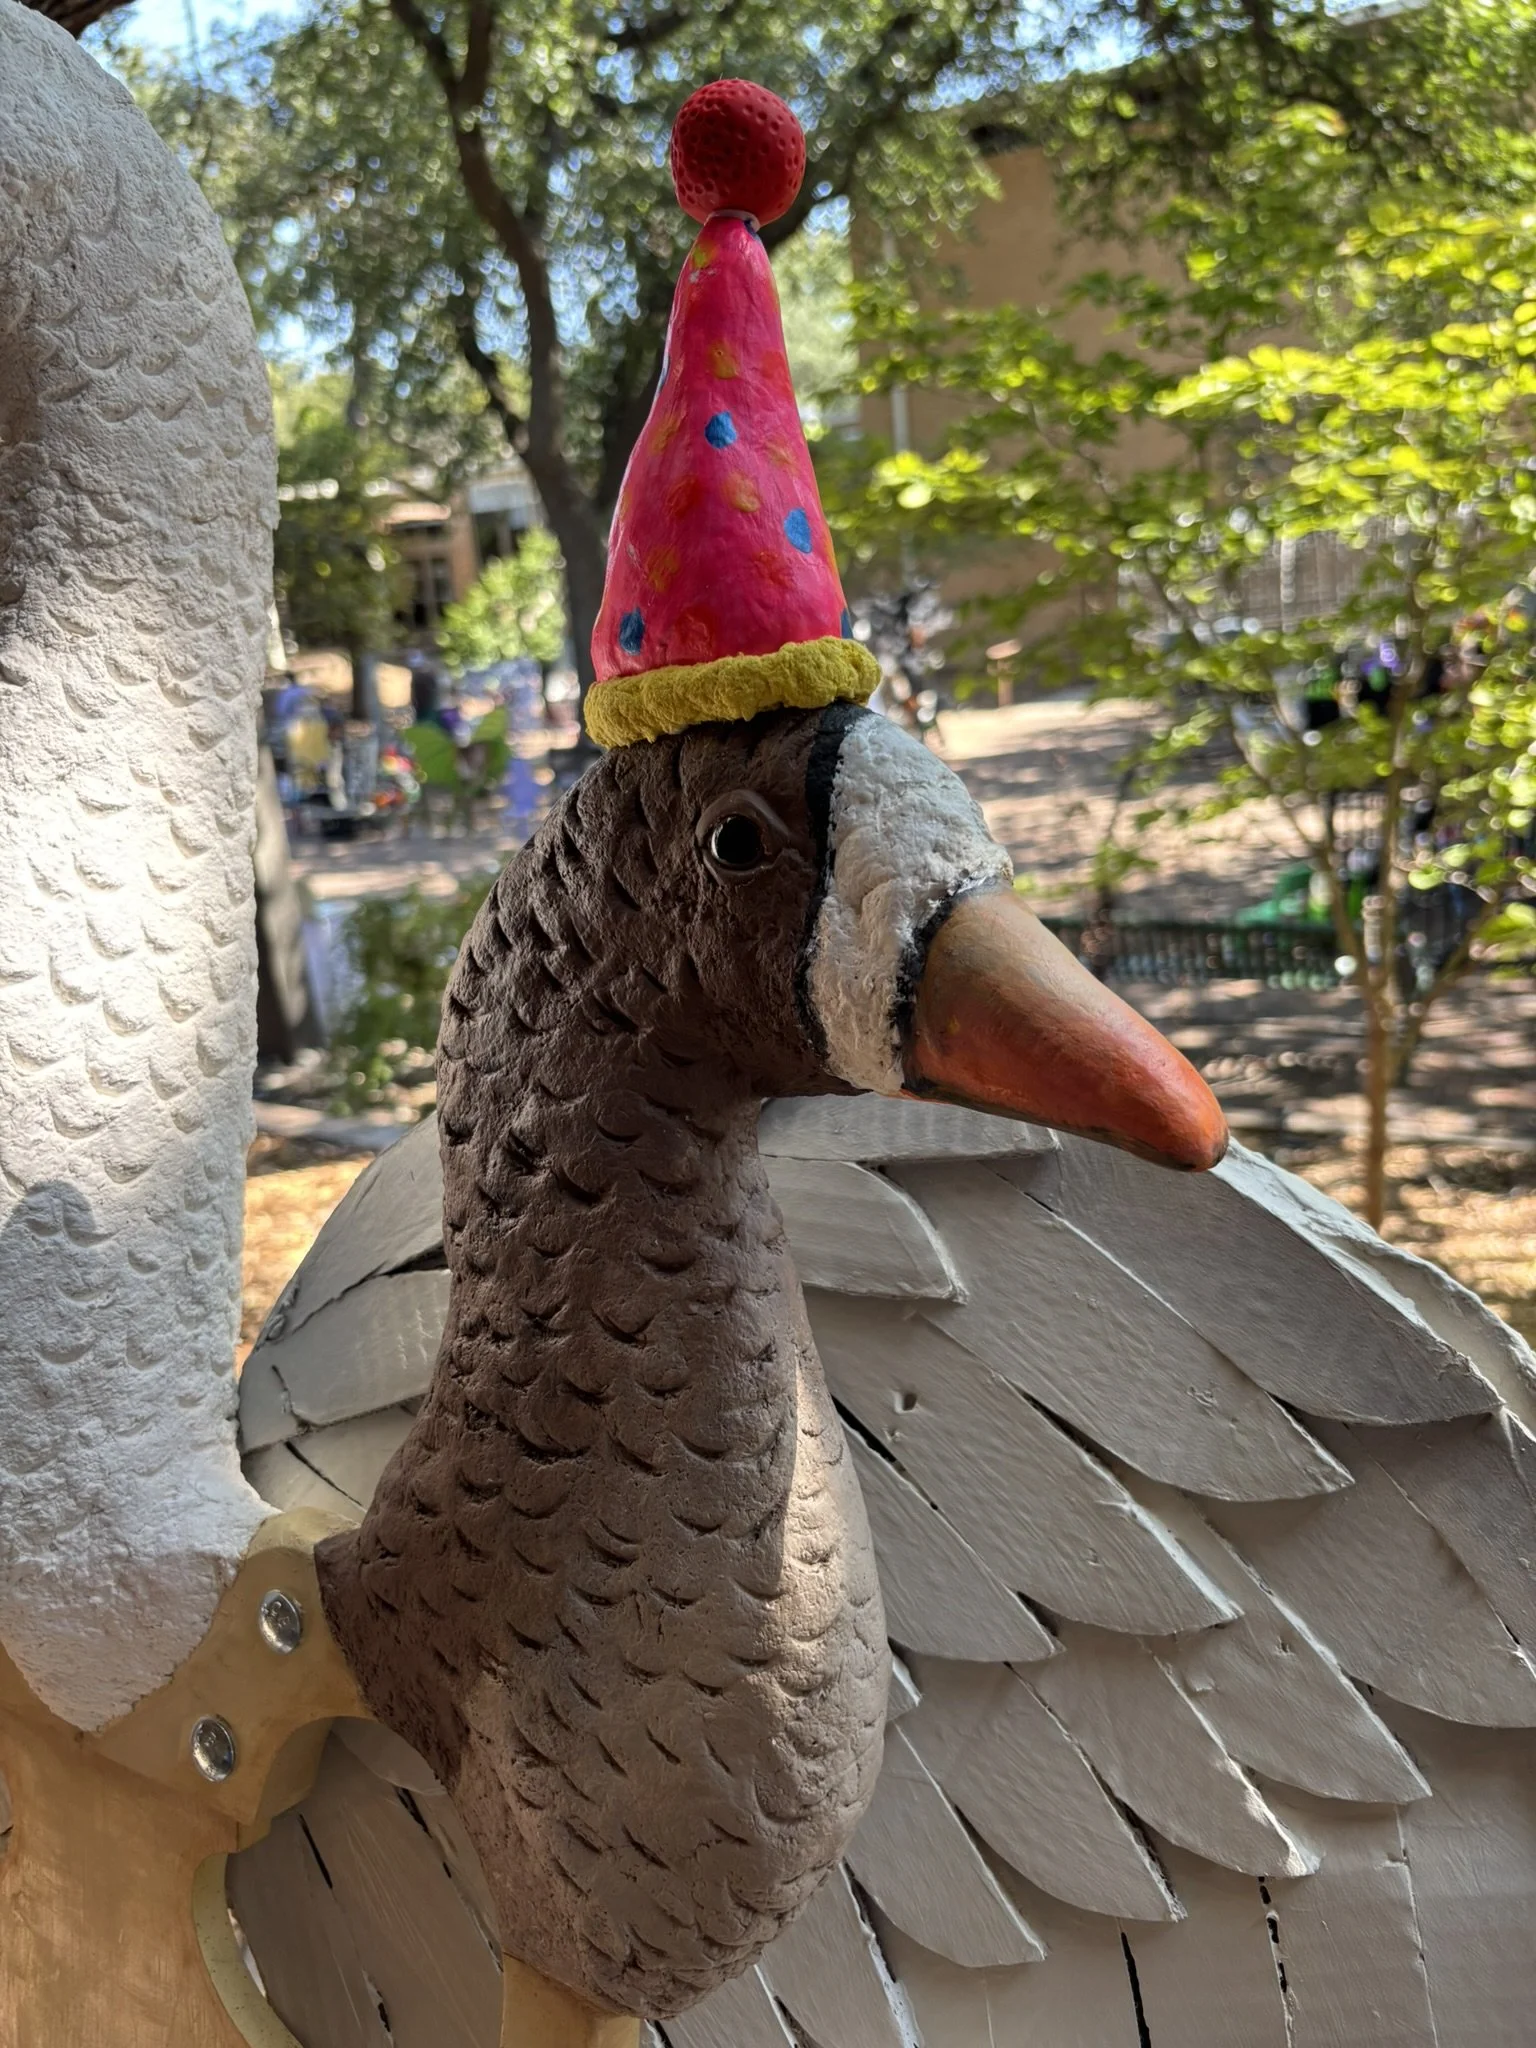
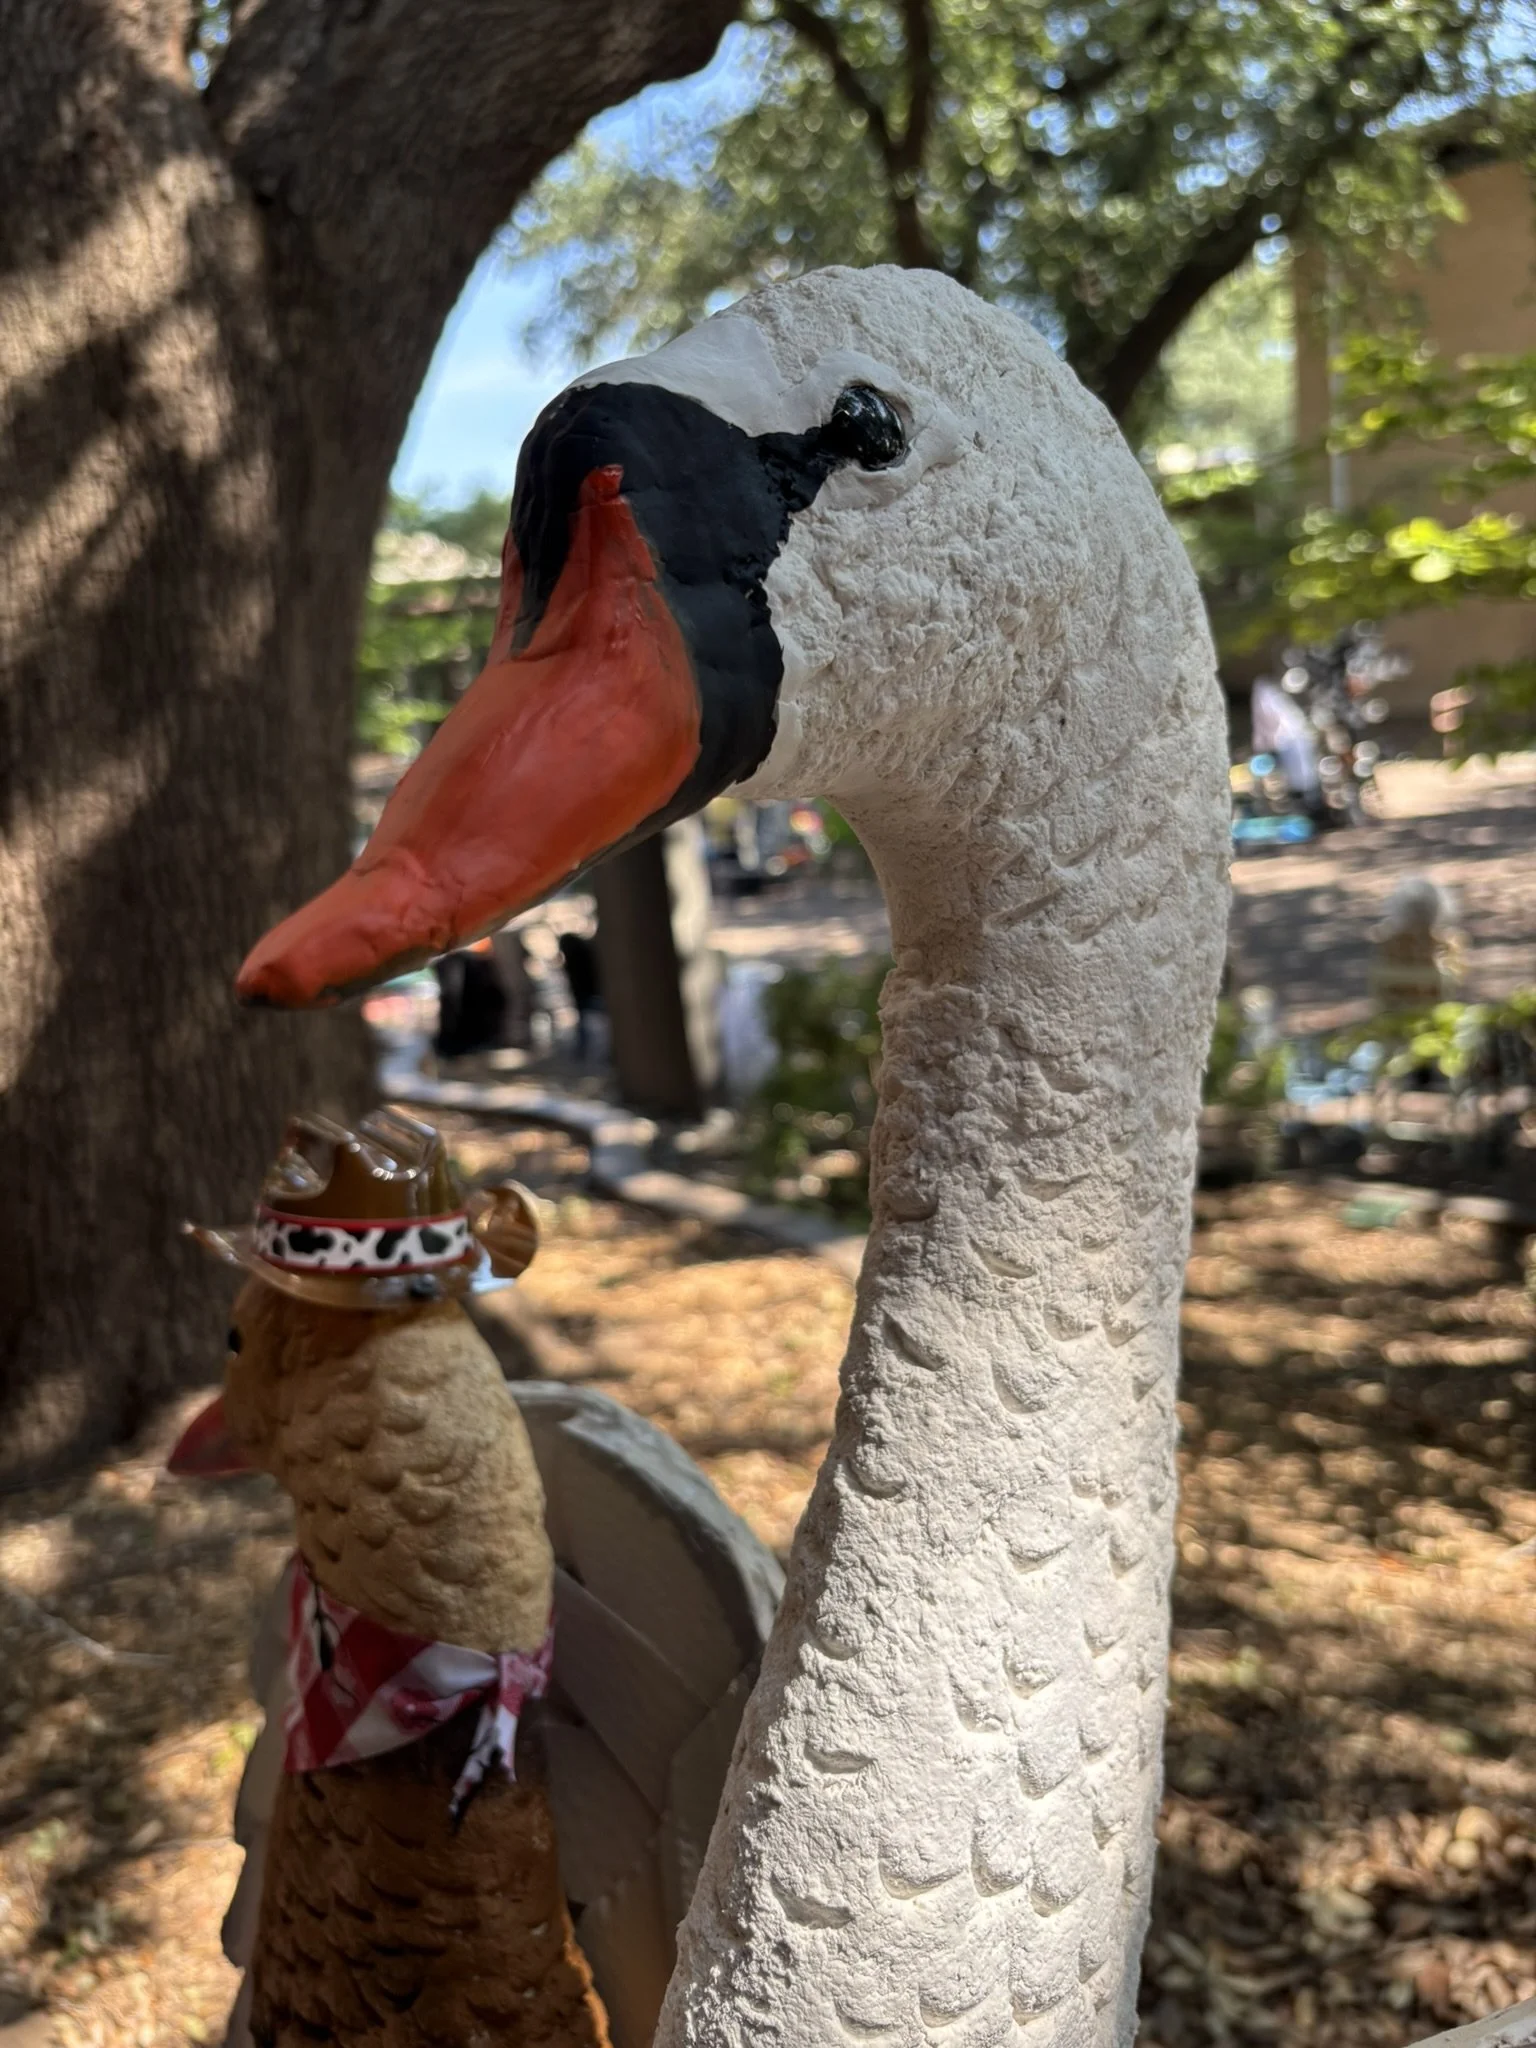
Canadian Goose
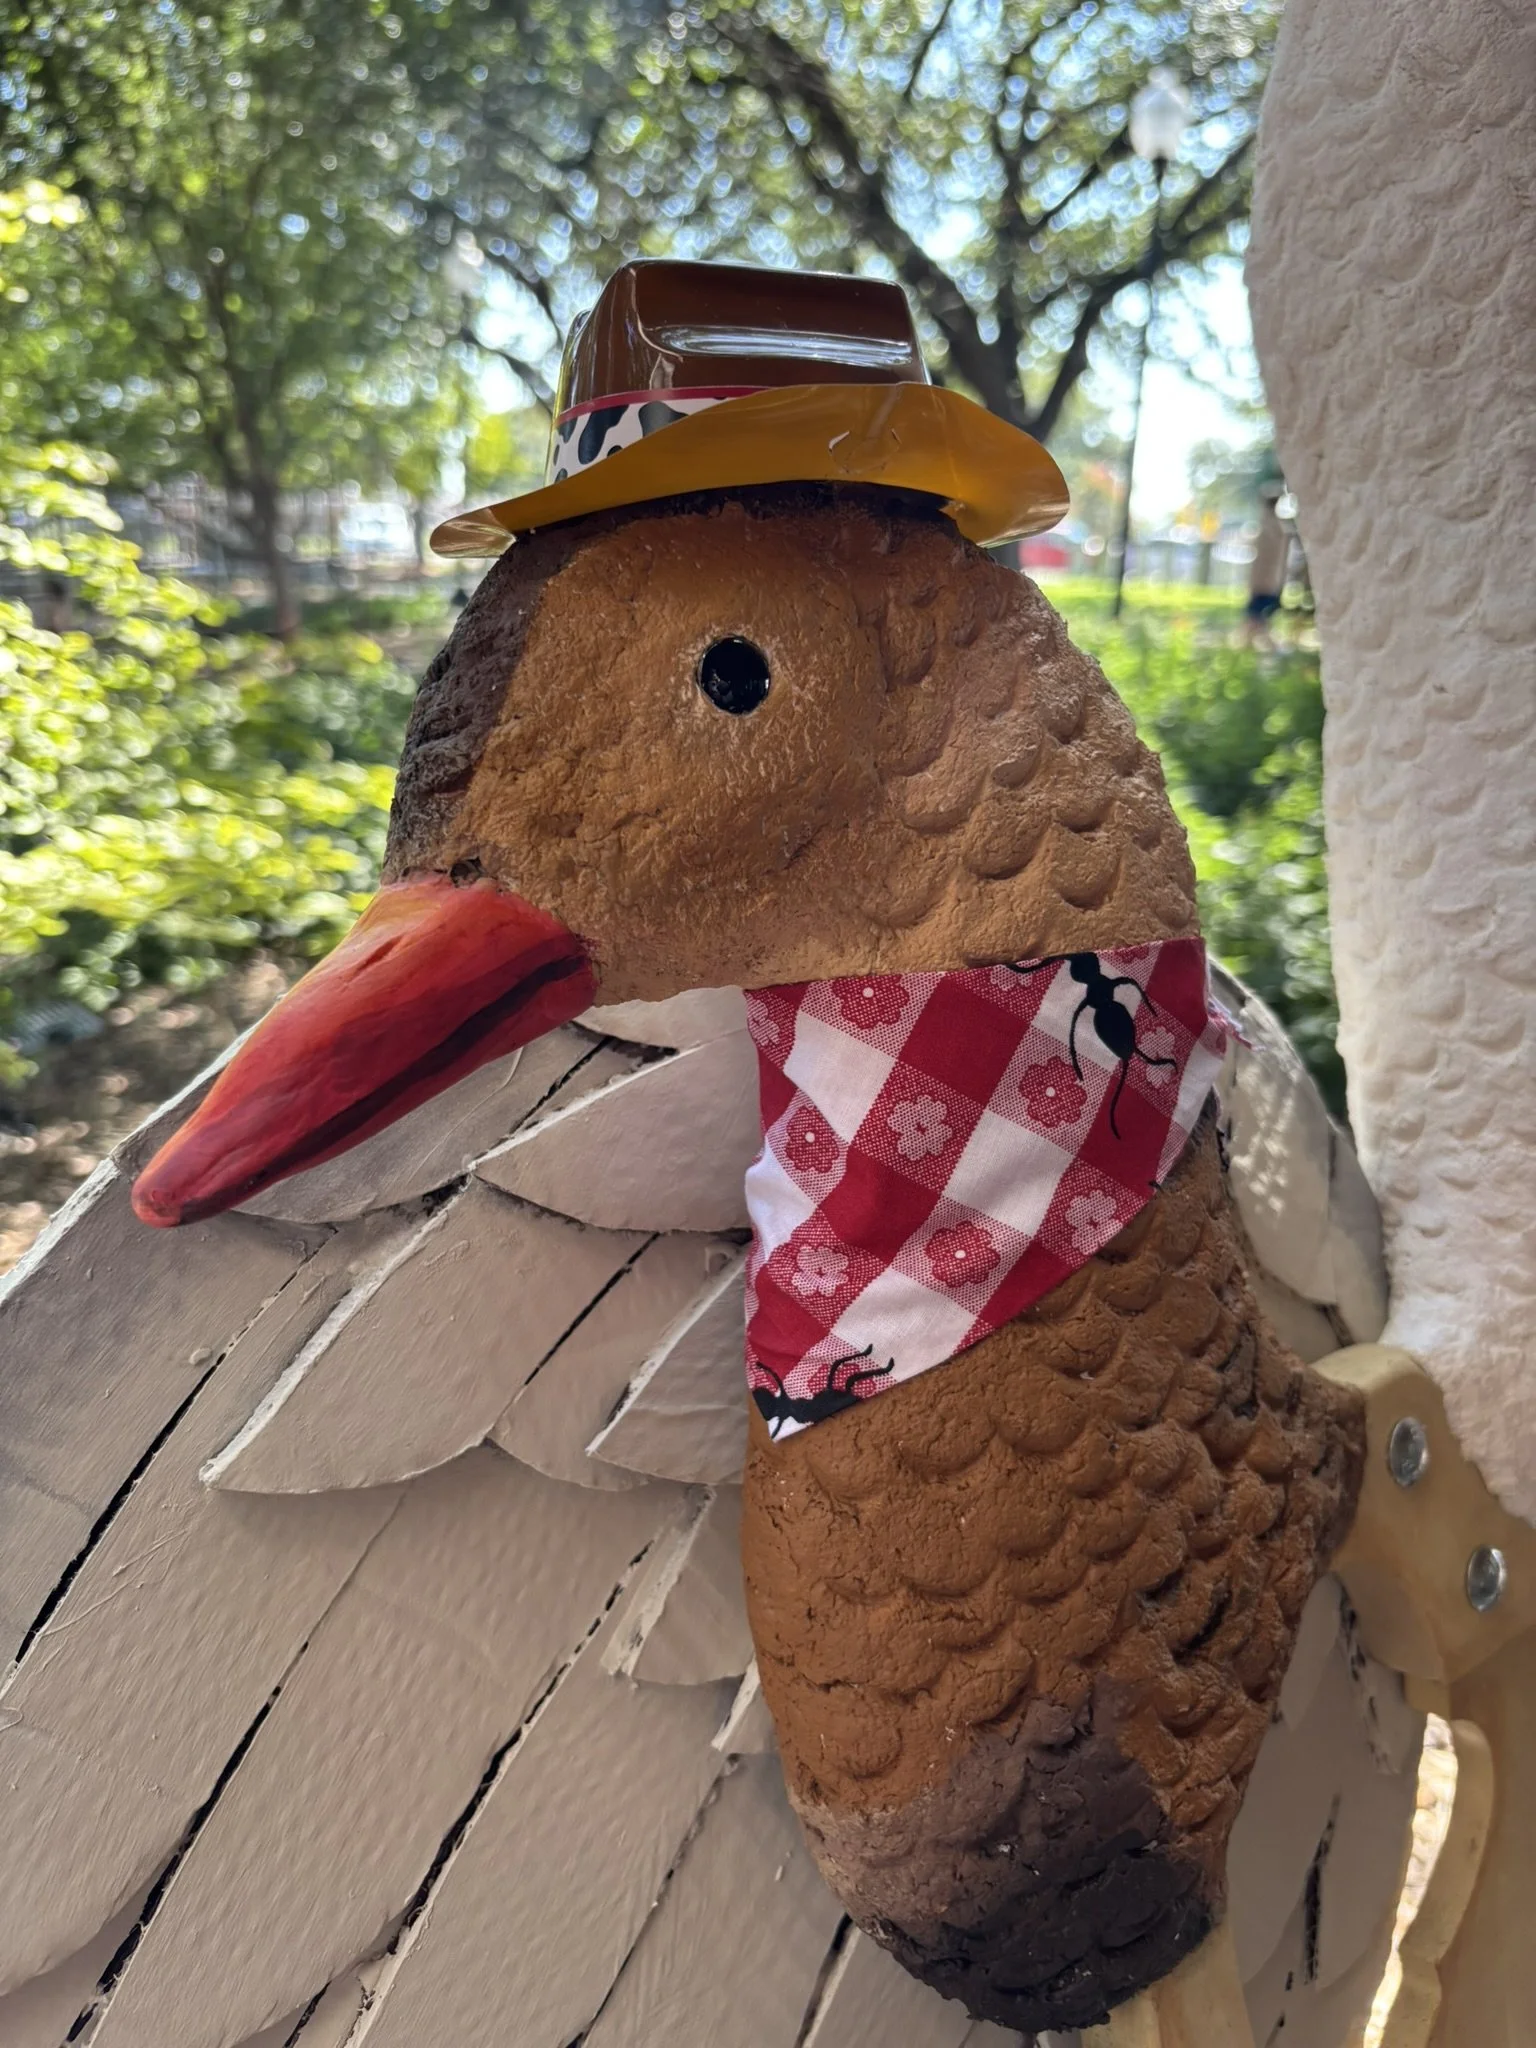
Black Bellied Whistling Duck
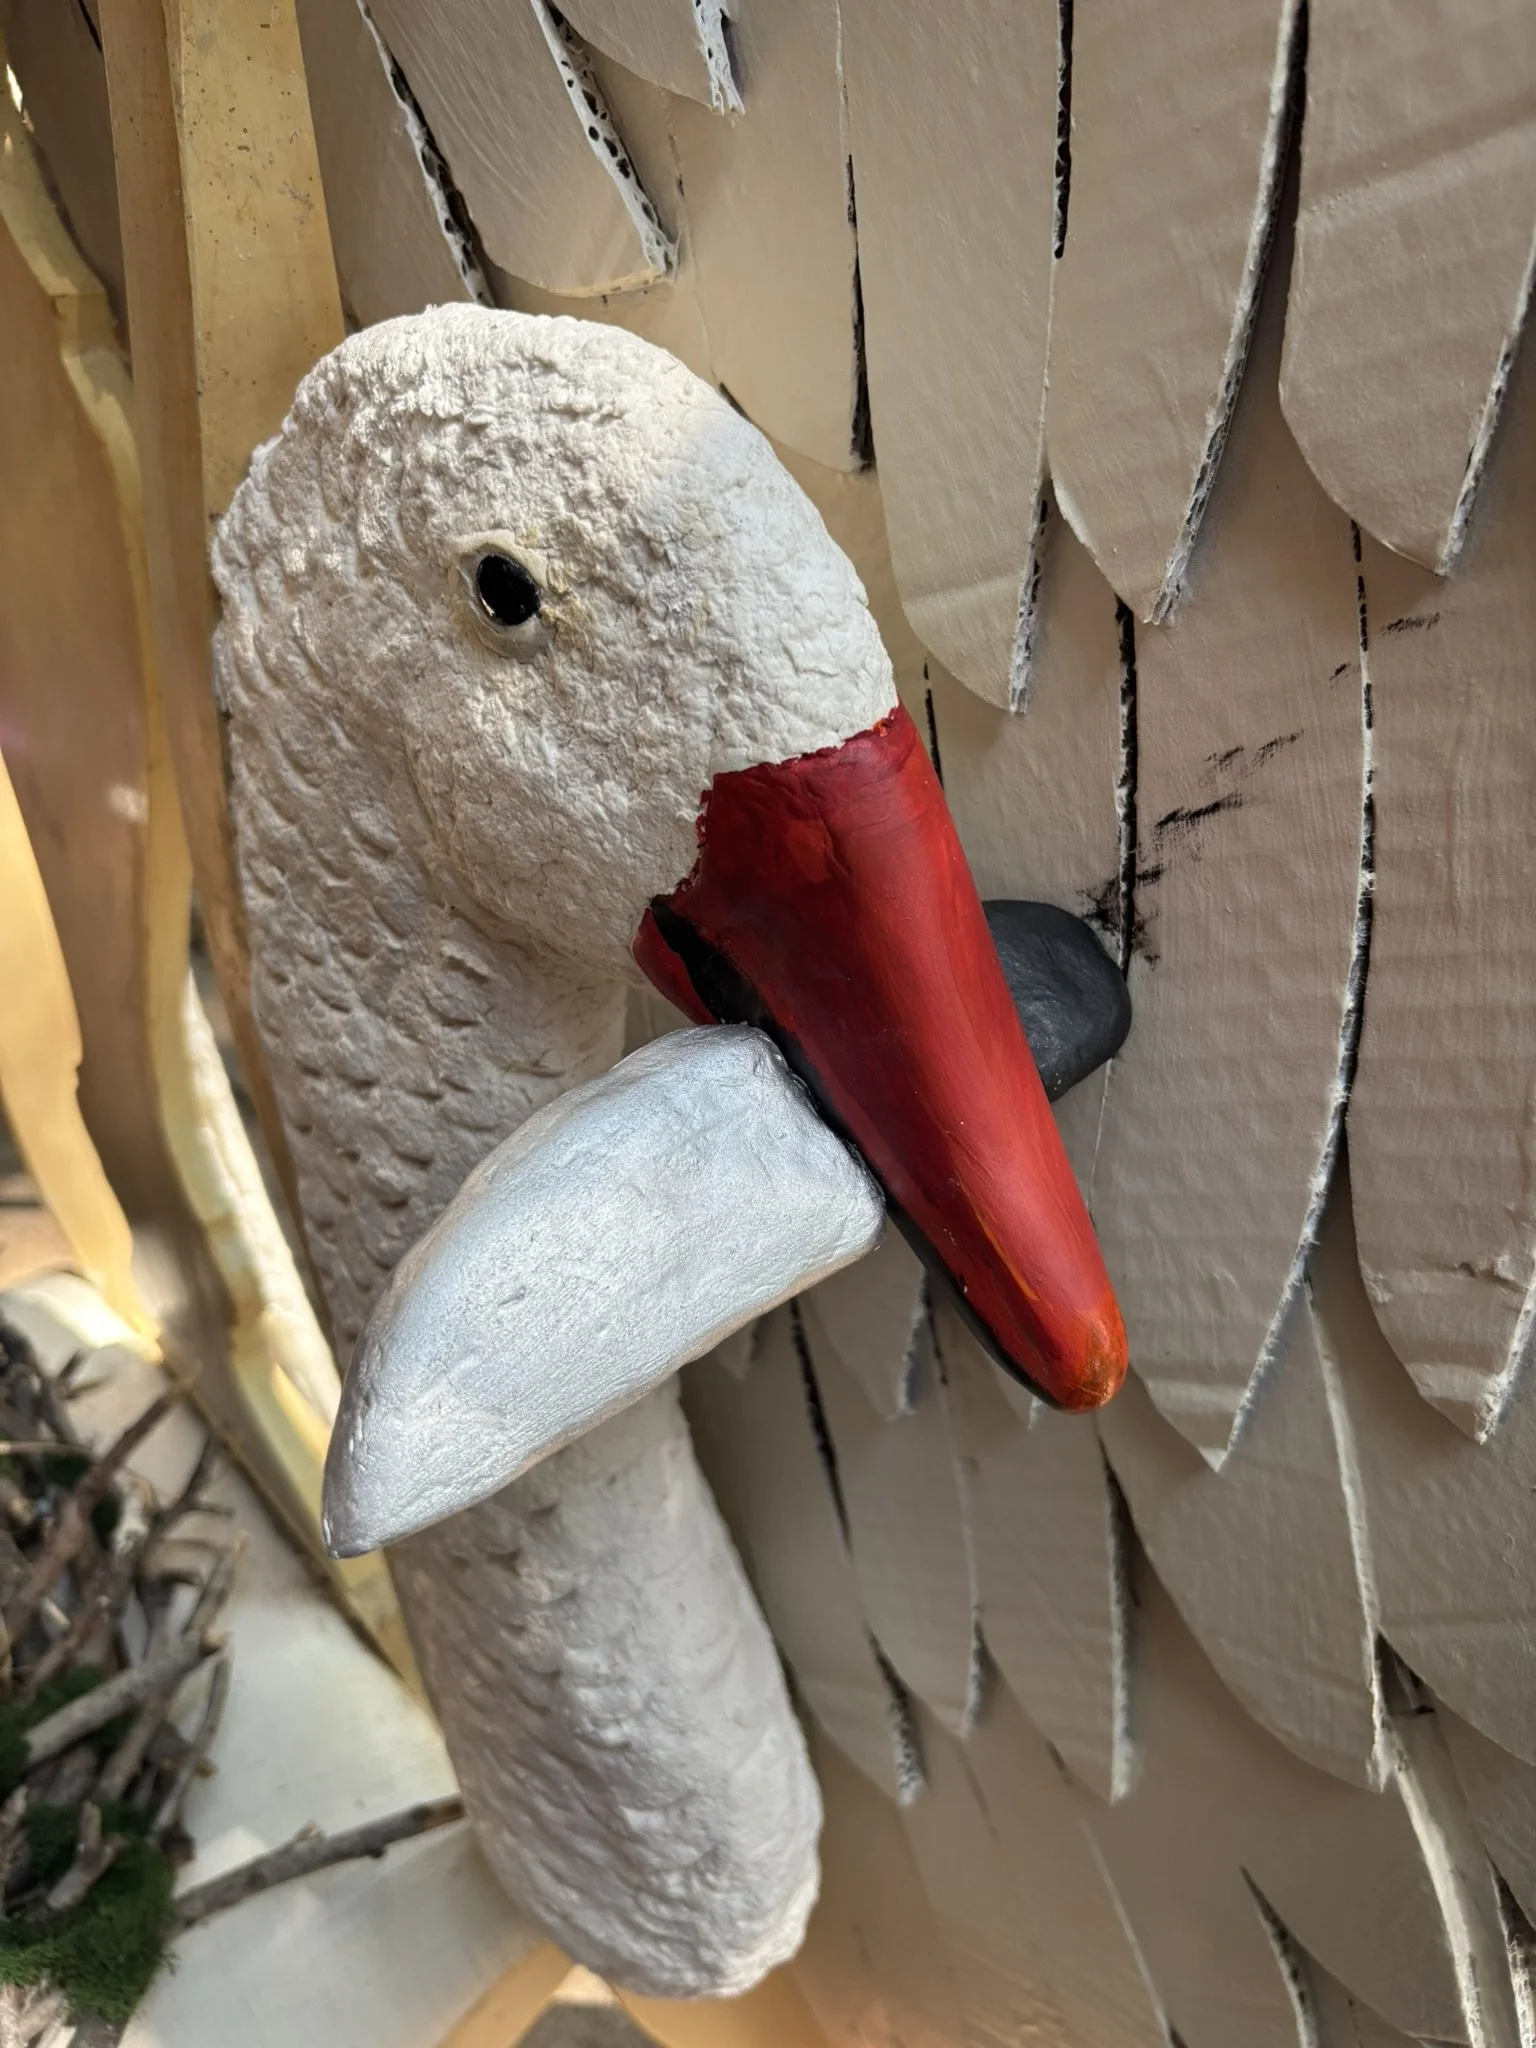
Swan
Greater White Fronted Goose
Snow Goose
This great and terrible evil also threatens our human community and includes the lack of affordable housing and rampant development in Denton. The former led to a stream of raw sewage that killed fish in a pond at Wind River Estates. Soon after, a large number of fish died in Unicorn Lake. Like us, the geese see the evil in the world and know they need to band together in their strengths to protect their precious resources and way of life!
The chair is also the natural predator of Ϛհąʍҽմʂ, our chair from last year, creating an expanded Scary Chair Universe (SCU). My hope is that we can build enough chairs to open a spiderweb salon scary chair bestiary someday.
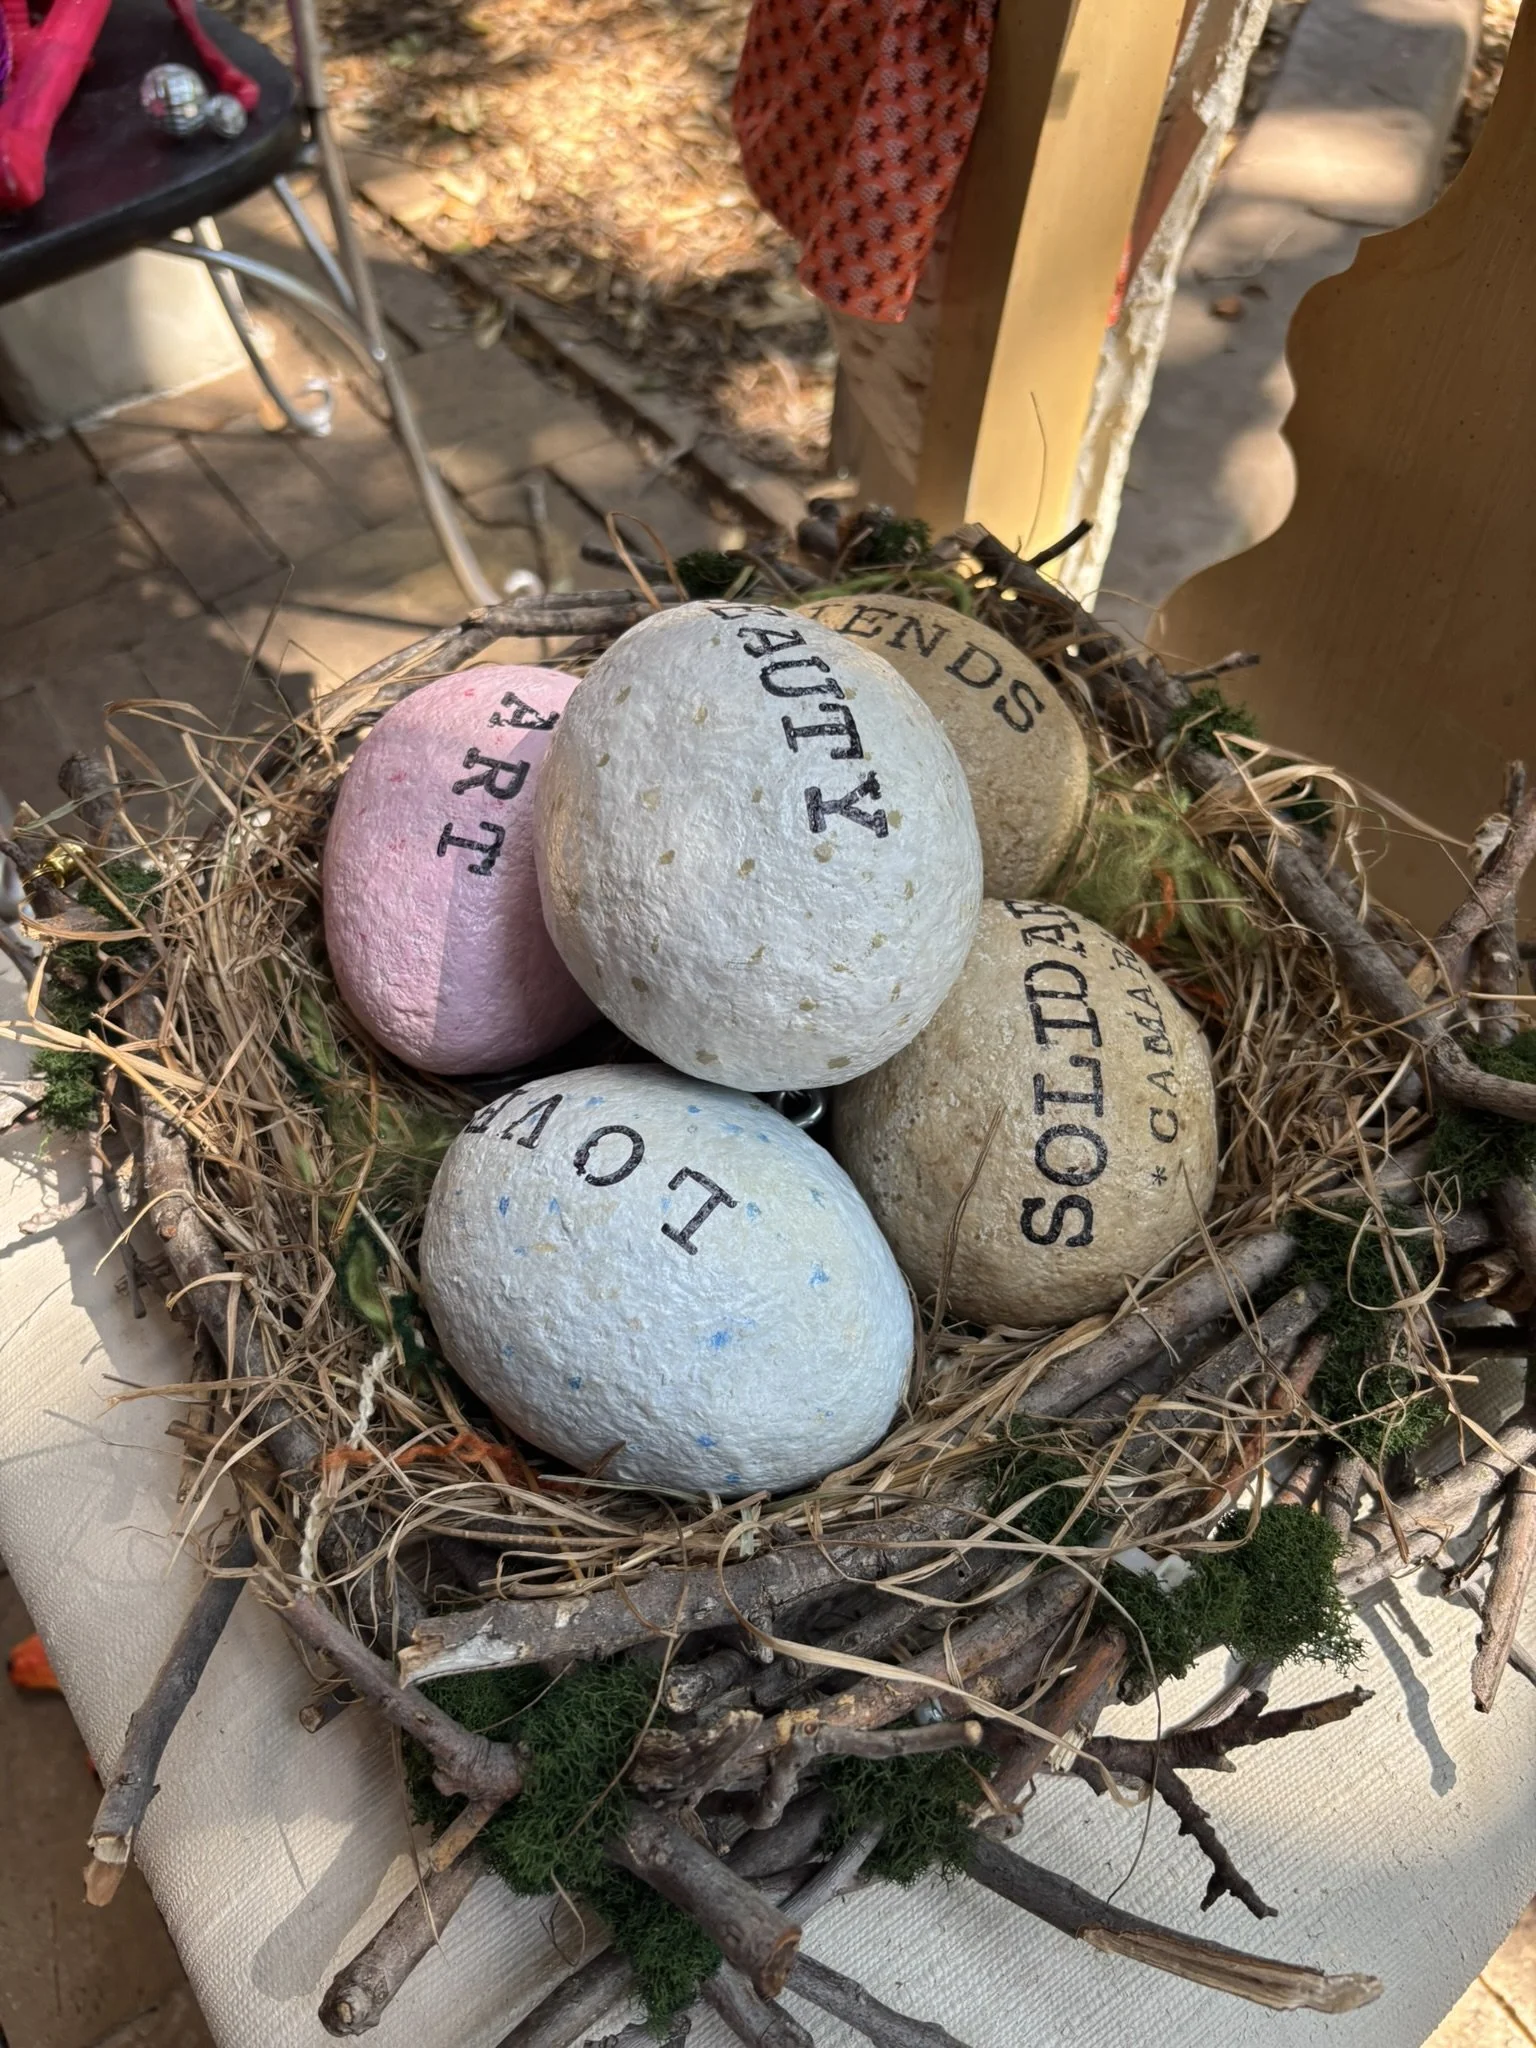
The goose chair is protecting five eggs in a nest on its seat. Each represents something precious you can’t buy that must be protected (Love, Beauty, Camaraderie, Art, and Friends).
Bird Facts (thanks Hannah!)
• Snow Geese and Greater White Fronted Geese migrate through North Texas.
• Canada Geese were migrants but have settled in North Texas.
• Swans are not native. Mute Swans are not native to North America. Trumpeter Swans are native to North America, but are not seen in North Texas often.
• Black Bellied Whistling Ducks are native to the tropics and South America but have expanded into the southeastern United States.
• Snow Geese and Greater White Fronted Geese will often migrate together.
• Black Bellied Whistling Ducks are closer to geese and swans and will sometimes flock with other geese.
• Swans typically don’t flock with other species and are more solitary and territorial. During migration, they will sometimes join Canadian Geese as pairs.
• All of these birds are mainly vegetarians, but Swans will occasionally eat small fish and insects.
The Build


Heads and Necks
To start this project, I traced the bird head and neck shapes onto butcher paper to make a template. I traced the template onto a big piece of cardboard so I could cut out the shape. One tool I want to spotlight is the Fiskars Power Cut scissors (not sponsored). It has curved blades with a serrated edge that grips the cardboard and slices through it so much easier than a box cutter or regular scissors.
Once I had the cardboard pieces cut out, my husband and fellow artist Edward drilled holes into the chair so we could insert support dowels for the shapes. We learned last year, building Ϛհąʍҽմʂ, that if there is too much weight on these cardboard pieces, they will flop over without extra support.


We installed the dowels and hot-glued the cardboard pieces onto the chair. At this stage you might be tempted to rush into paper mache but don’t! Before moving onto paper mache, you want to paint everything to seal the cardboard. Because if you apply paper mache pulp to naked cardboard, it will get wet and start to pull away from the hot glue.
We actually lost one of our goose heads because my paper mache mix was too wet and it fell off the chair.
The mix of paper mache that I was using for this part of the project was half paper pulp made from brown grocery bags that I shredded, immersion blended and strained. The other half was sawdust I got from a local artist who makes resin and wood pieces.
Mixed with glue, the texture was soft with pokey chunks that had the consistency of chicken salad. The paper mache pulp took a few days to dry but once it did it was hard as a rock and we were ready to move on to the next step: More paper mache pulp!

For this second layer, I used toilet paper. I cut it off the roll, soaked it in water, immersion blended it, strained it, and added glue. I applied this on top of the dried sawdust/grocery bag mix, which was rough and craggy so the toilet paper had no problem hanging onto it.
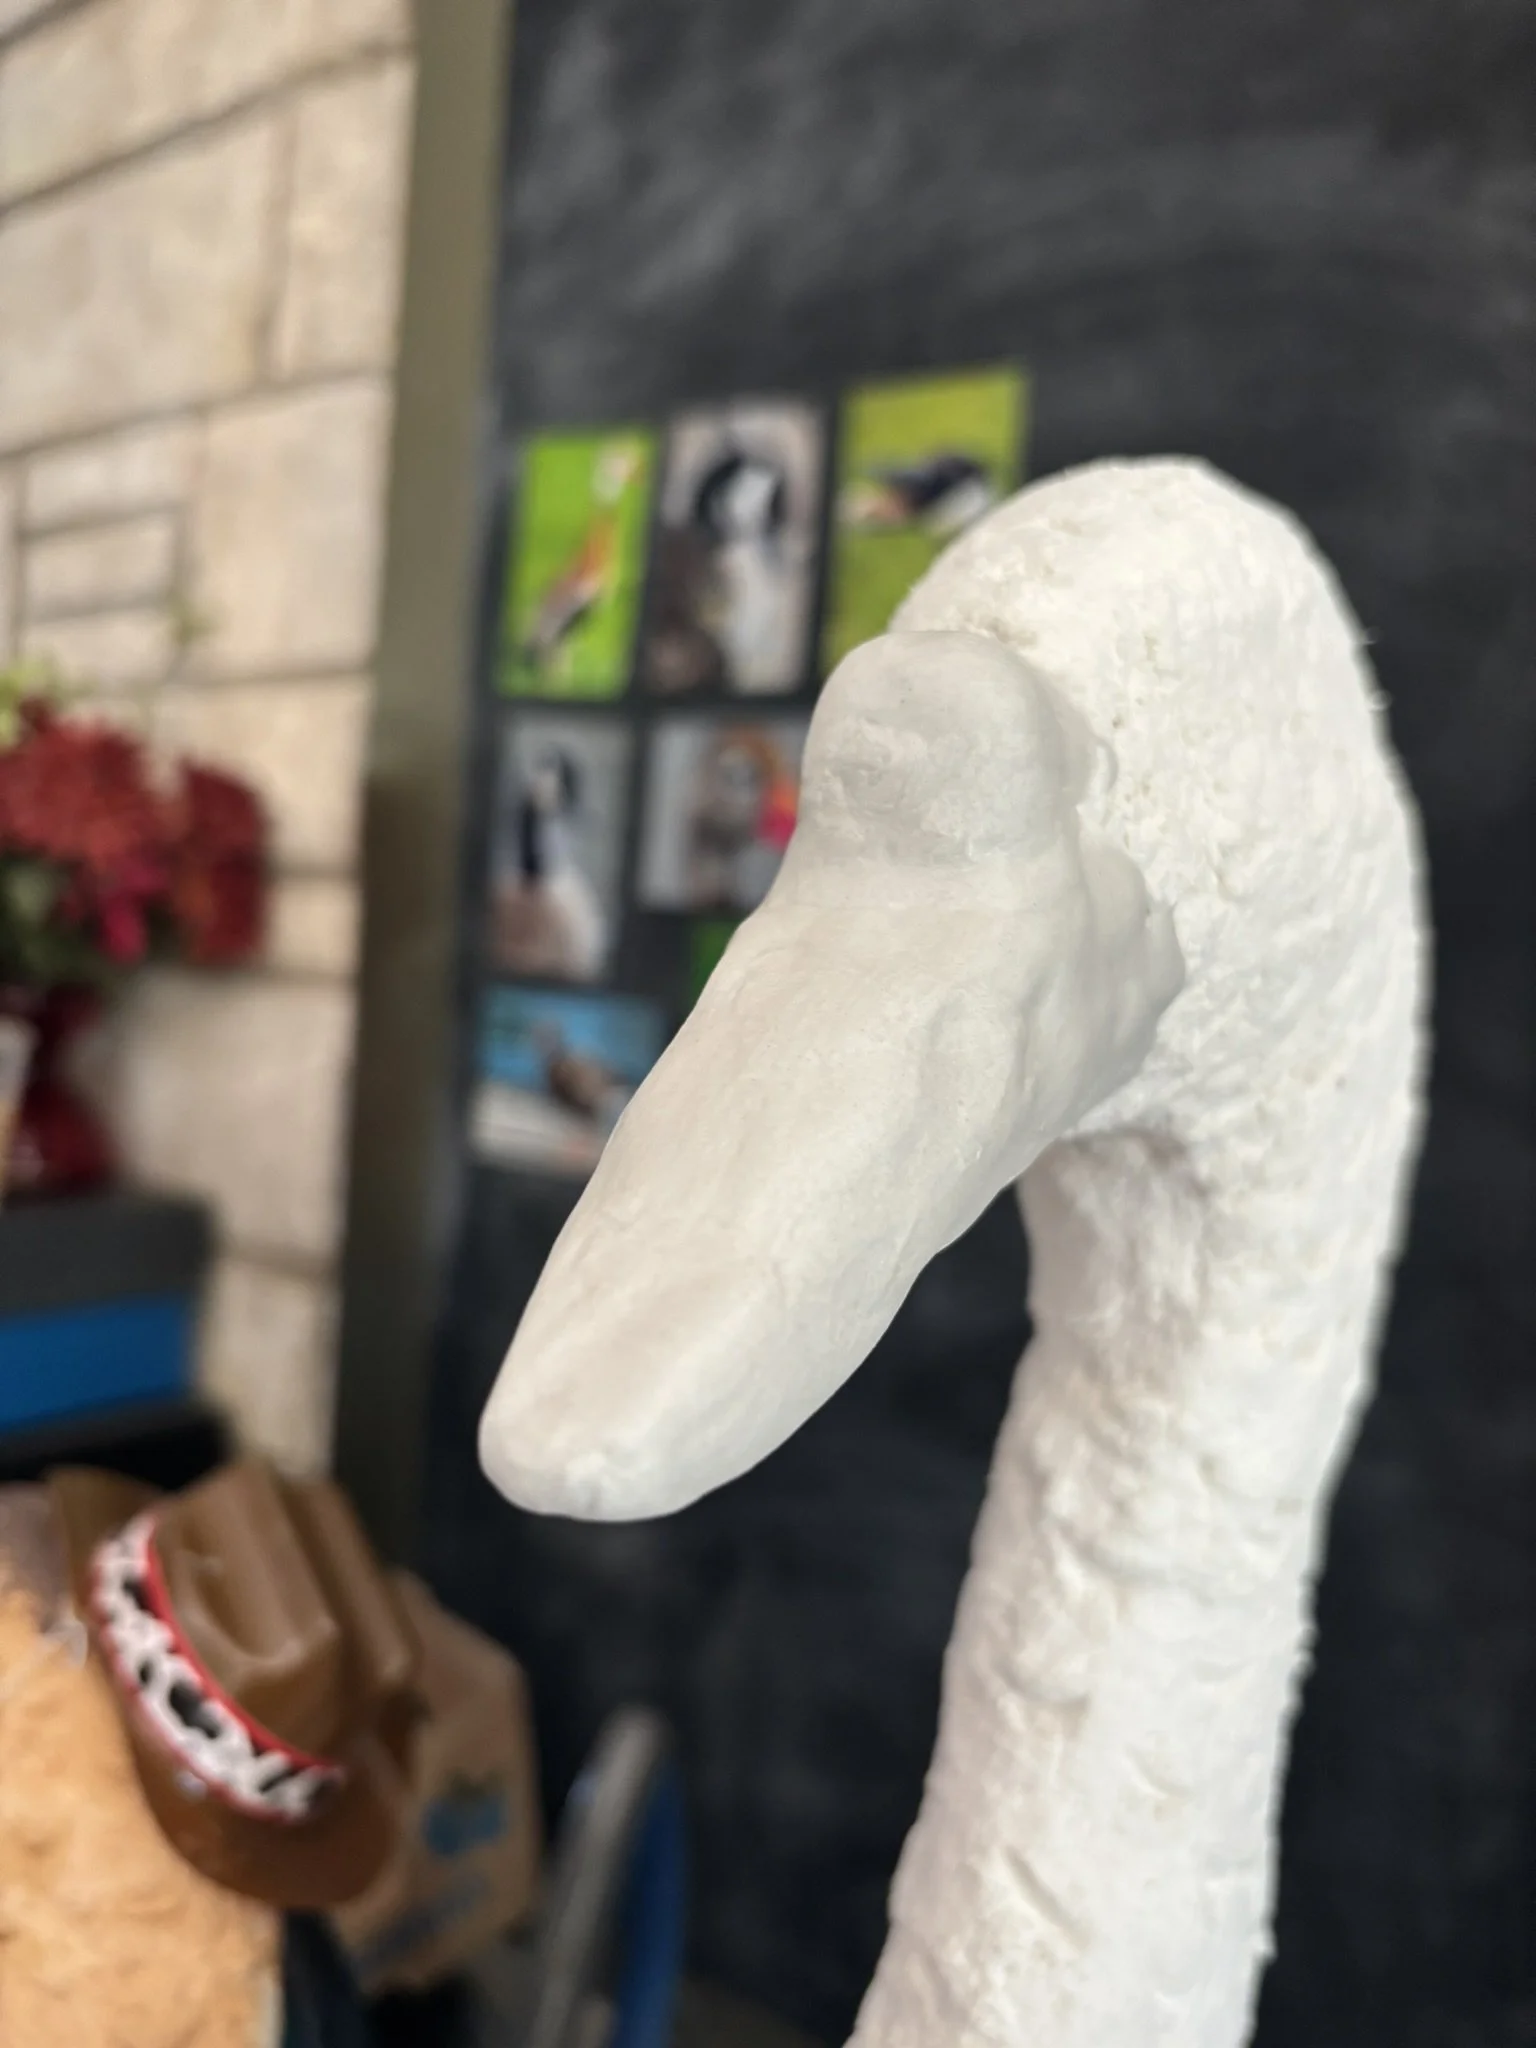
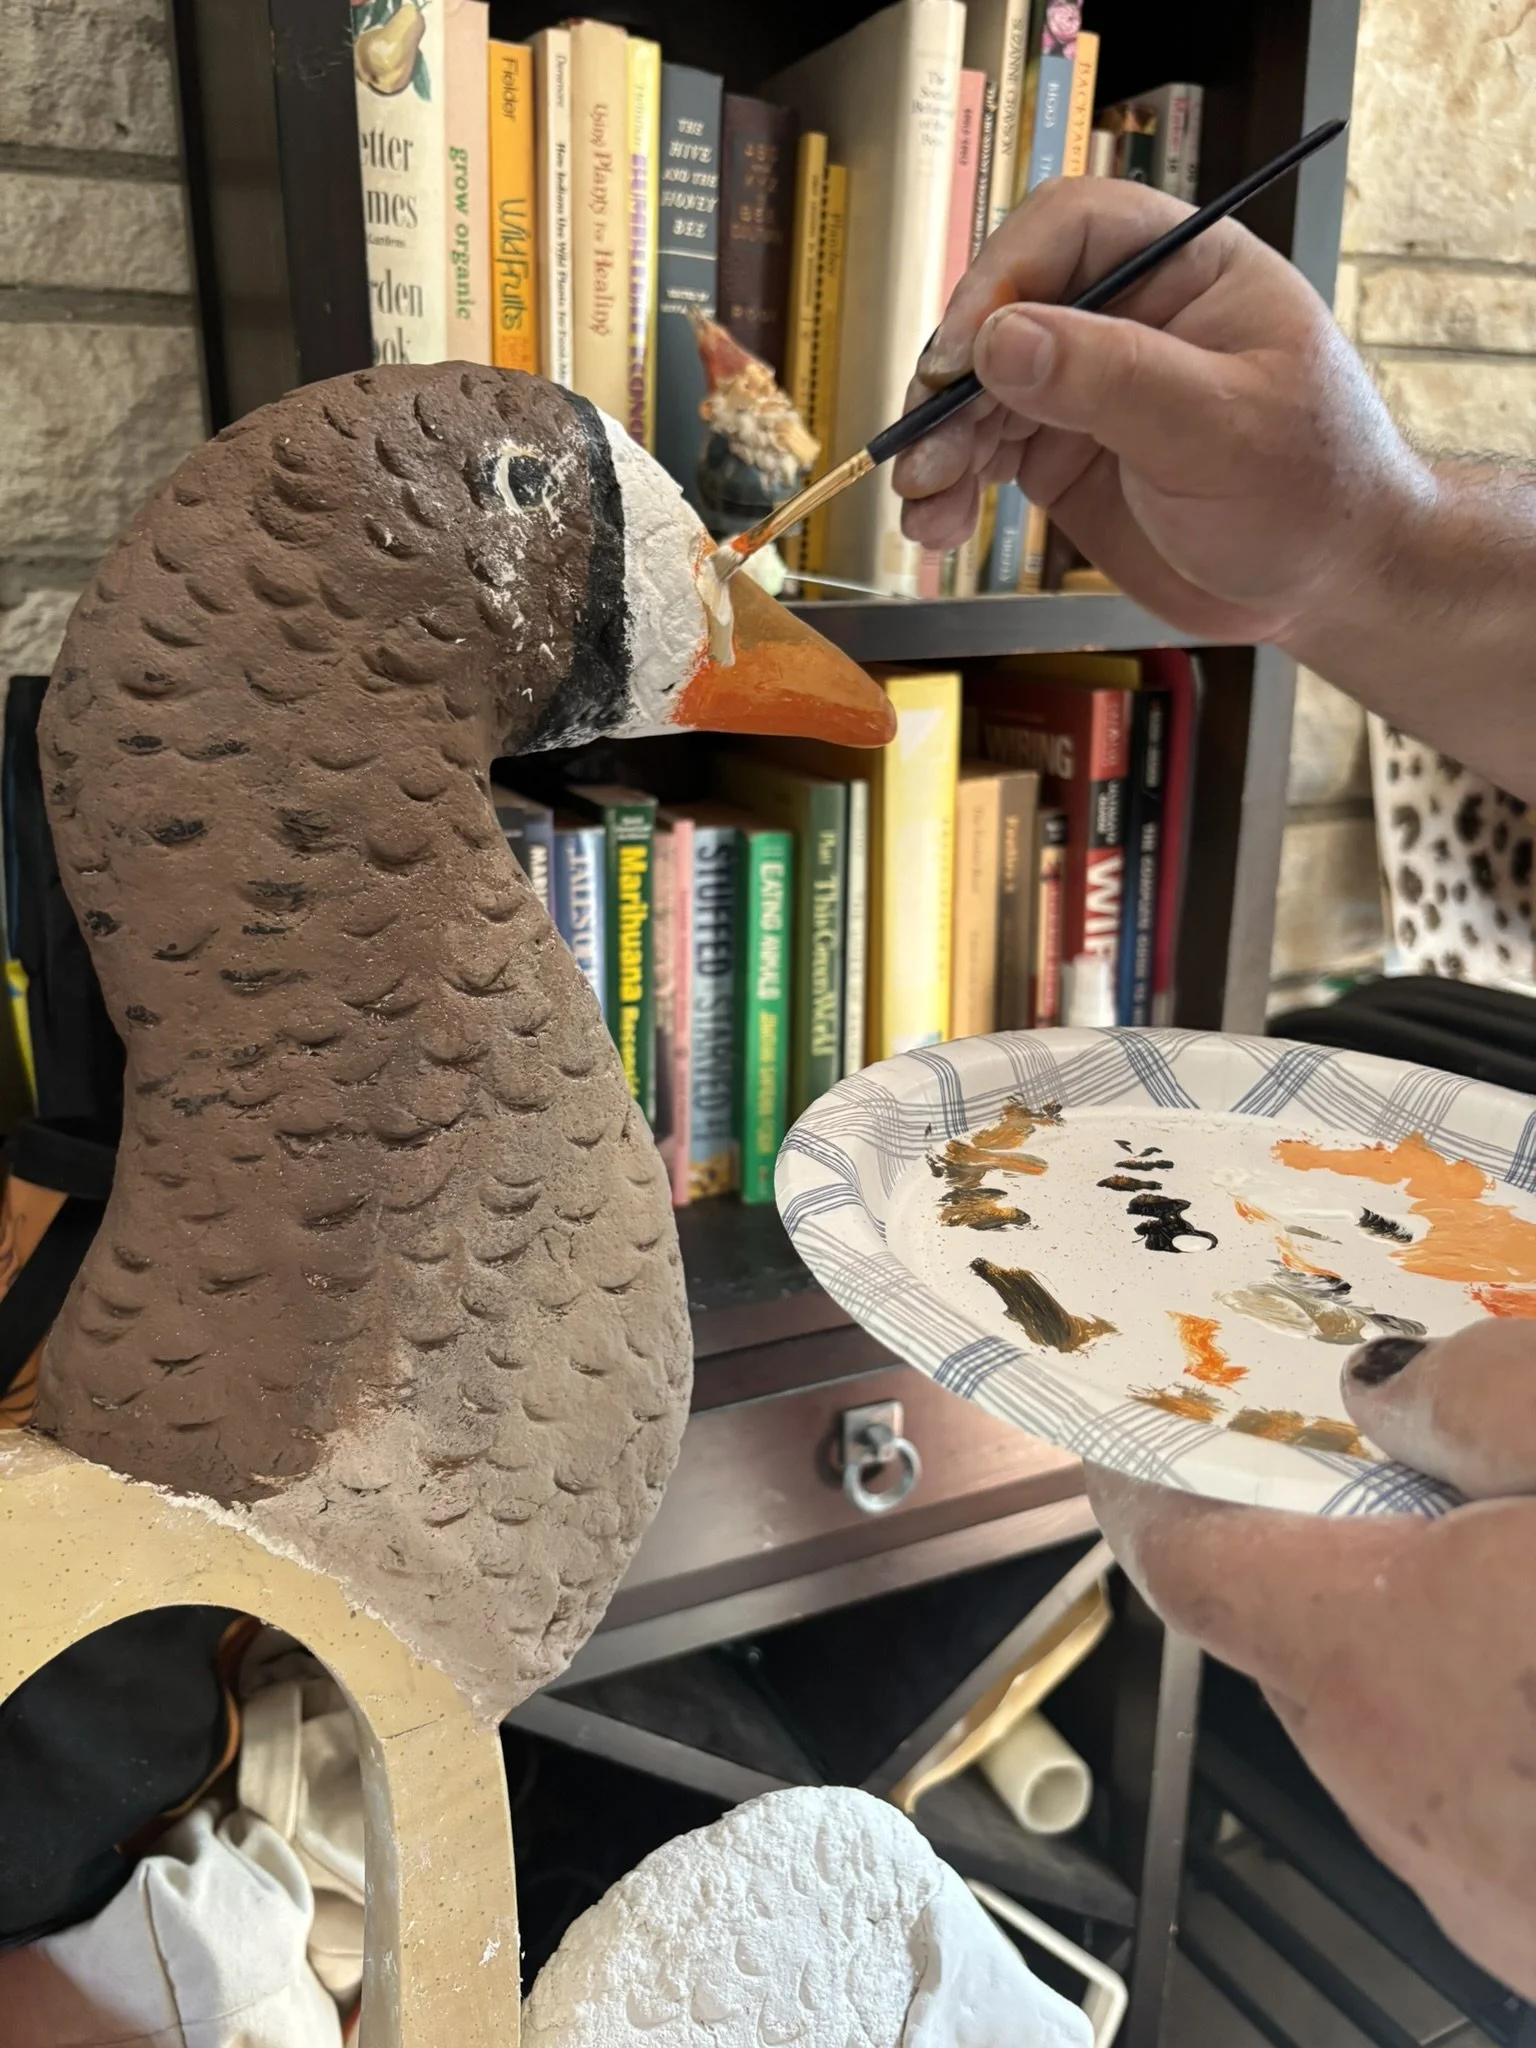
The toilet paper mache pulp was an interesting material because it gives a very fluffy effect, which makes sense because it's toilet paper. After applying that toilet paper layer everywhere except the beaks, I went over it with a spoon to make impressions that looked like feathers.
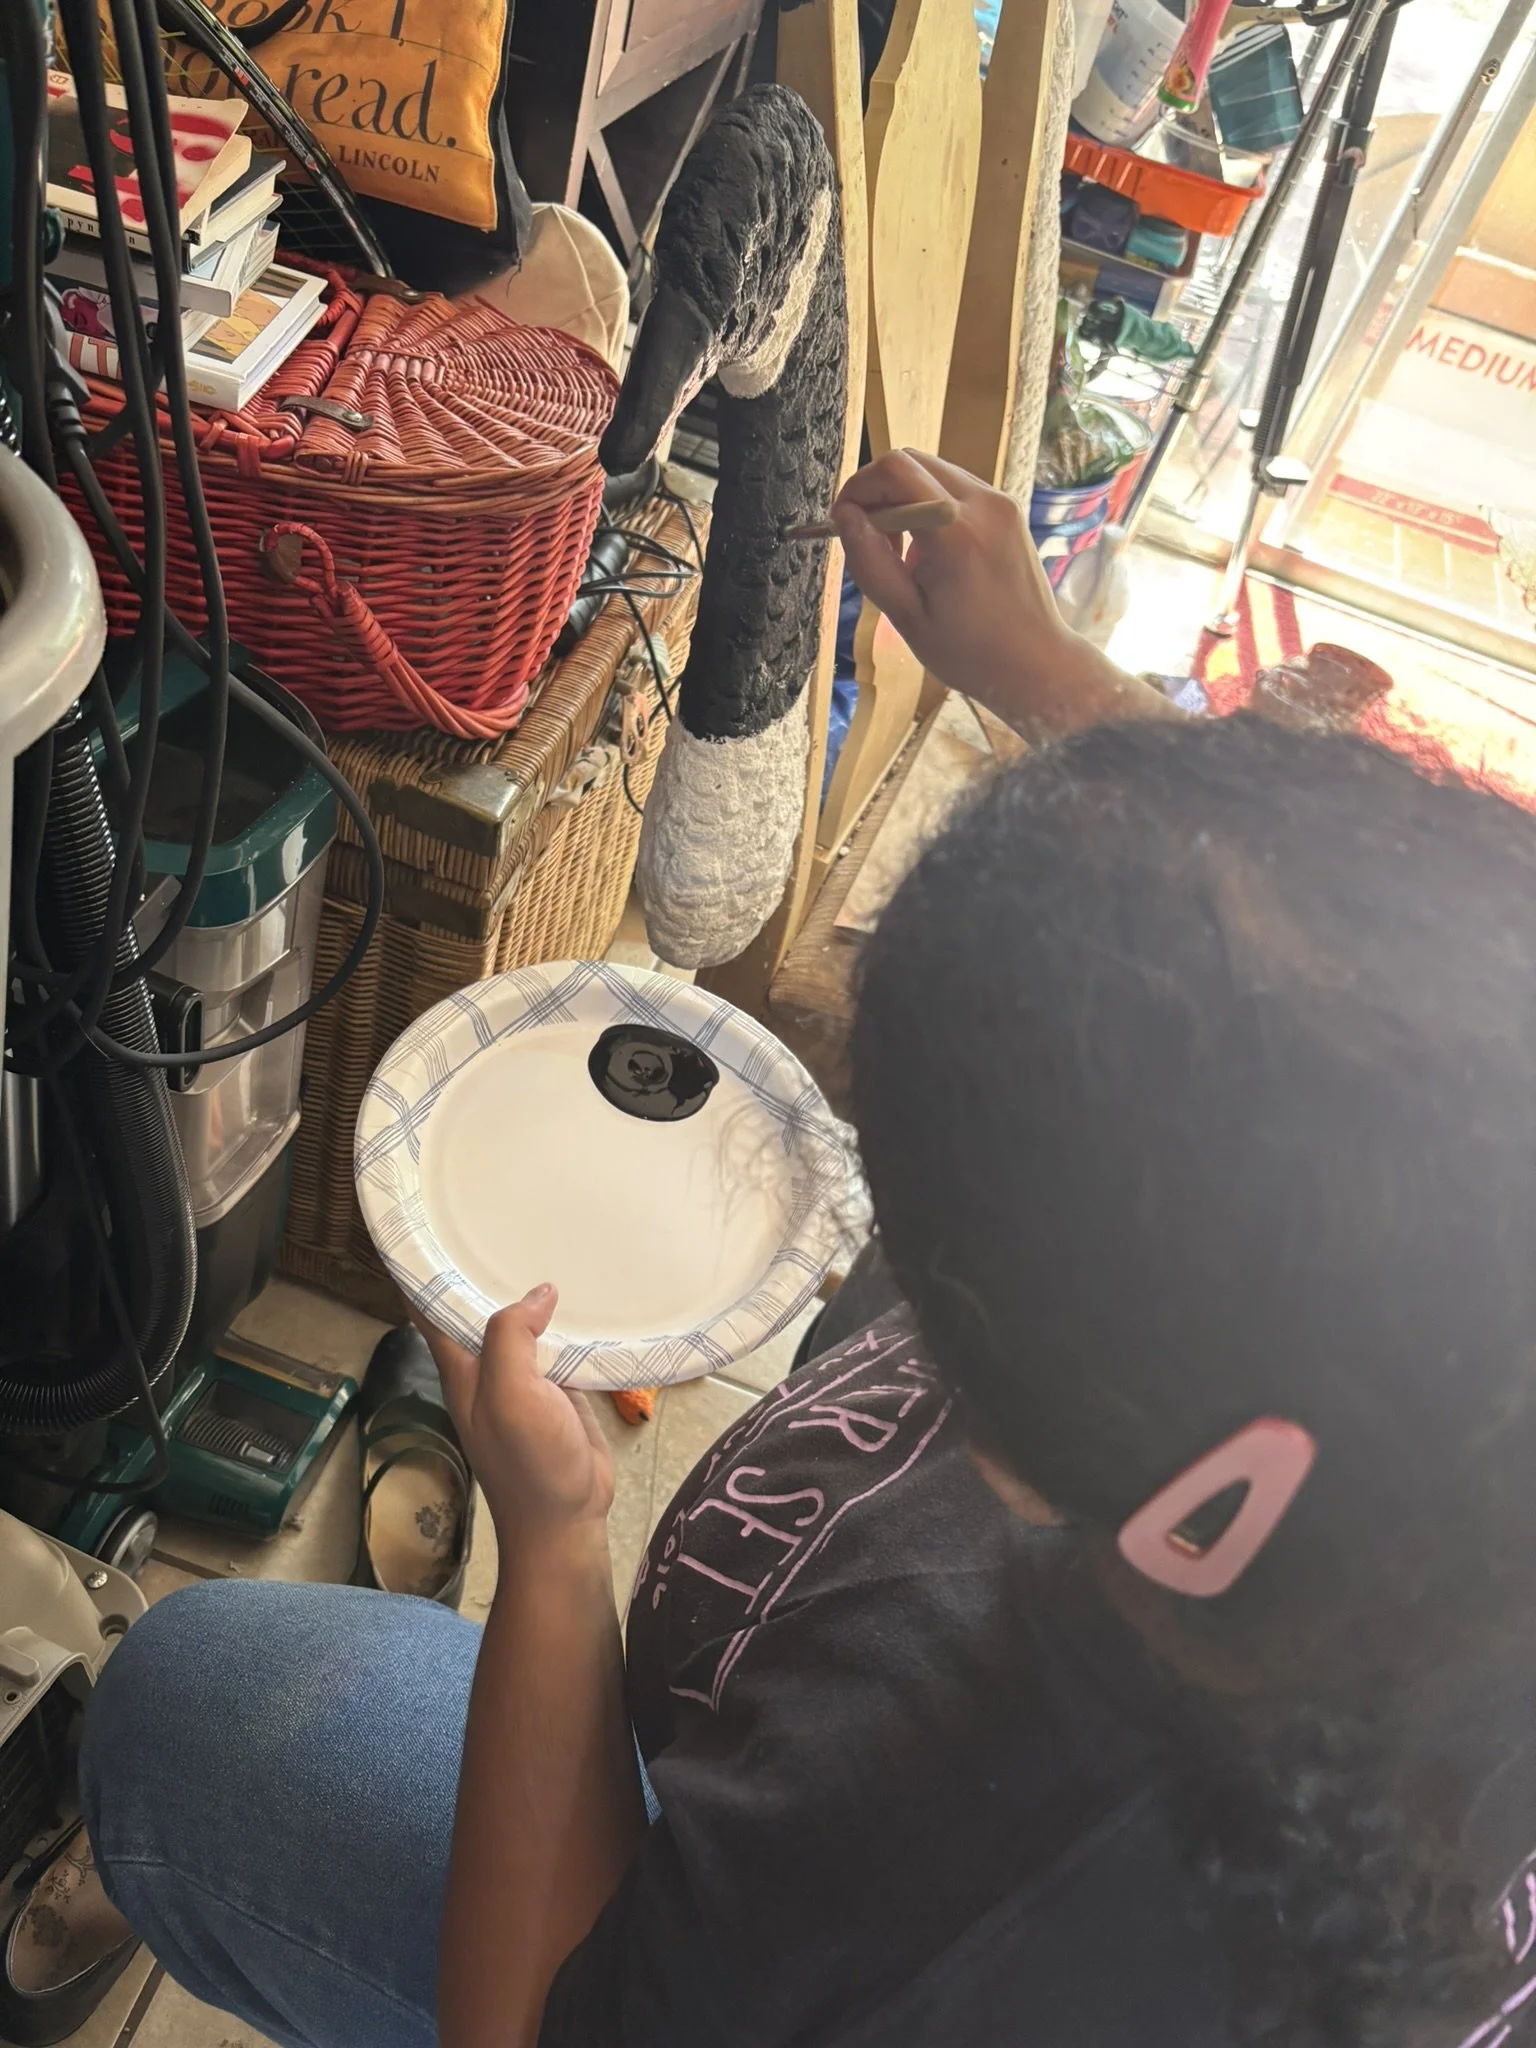
The birds then got a paint job from Meghna and Edward. The next step was to add beaks, eyes and eyelids. The beaks were made by smoothing some air -dry clay over them. The eyes were glass cabochons painted with nail polish on the flat side. I hot-glued the eyes to the birds and then took some air-dry clay and rolled it in my hand until it became a wormy noodle. I pressed one noodle on top of the cabochon and one at the bottom to form the eyelid.
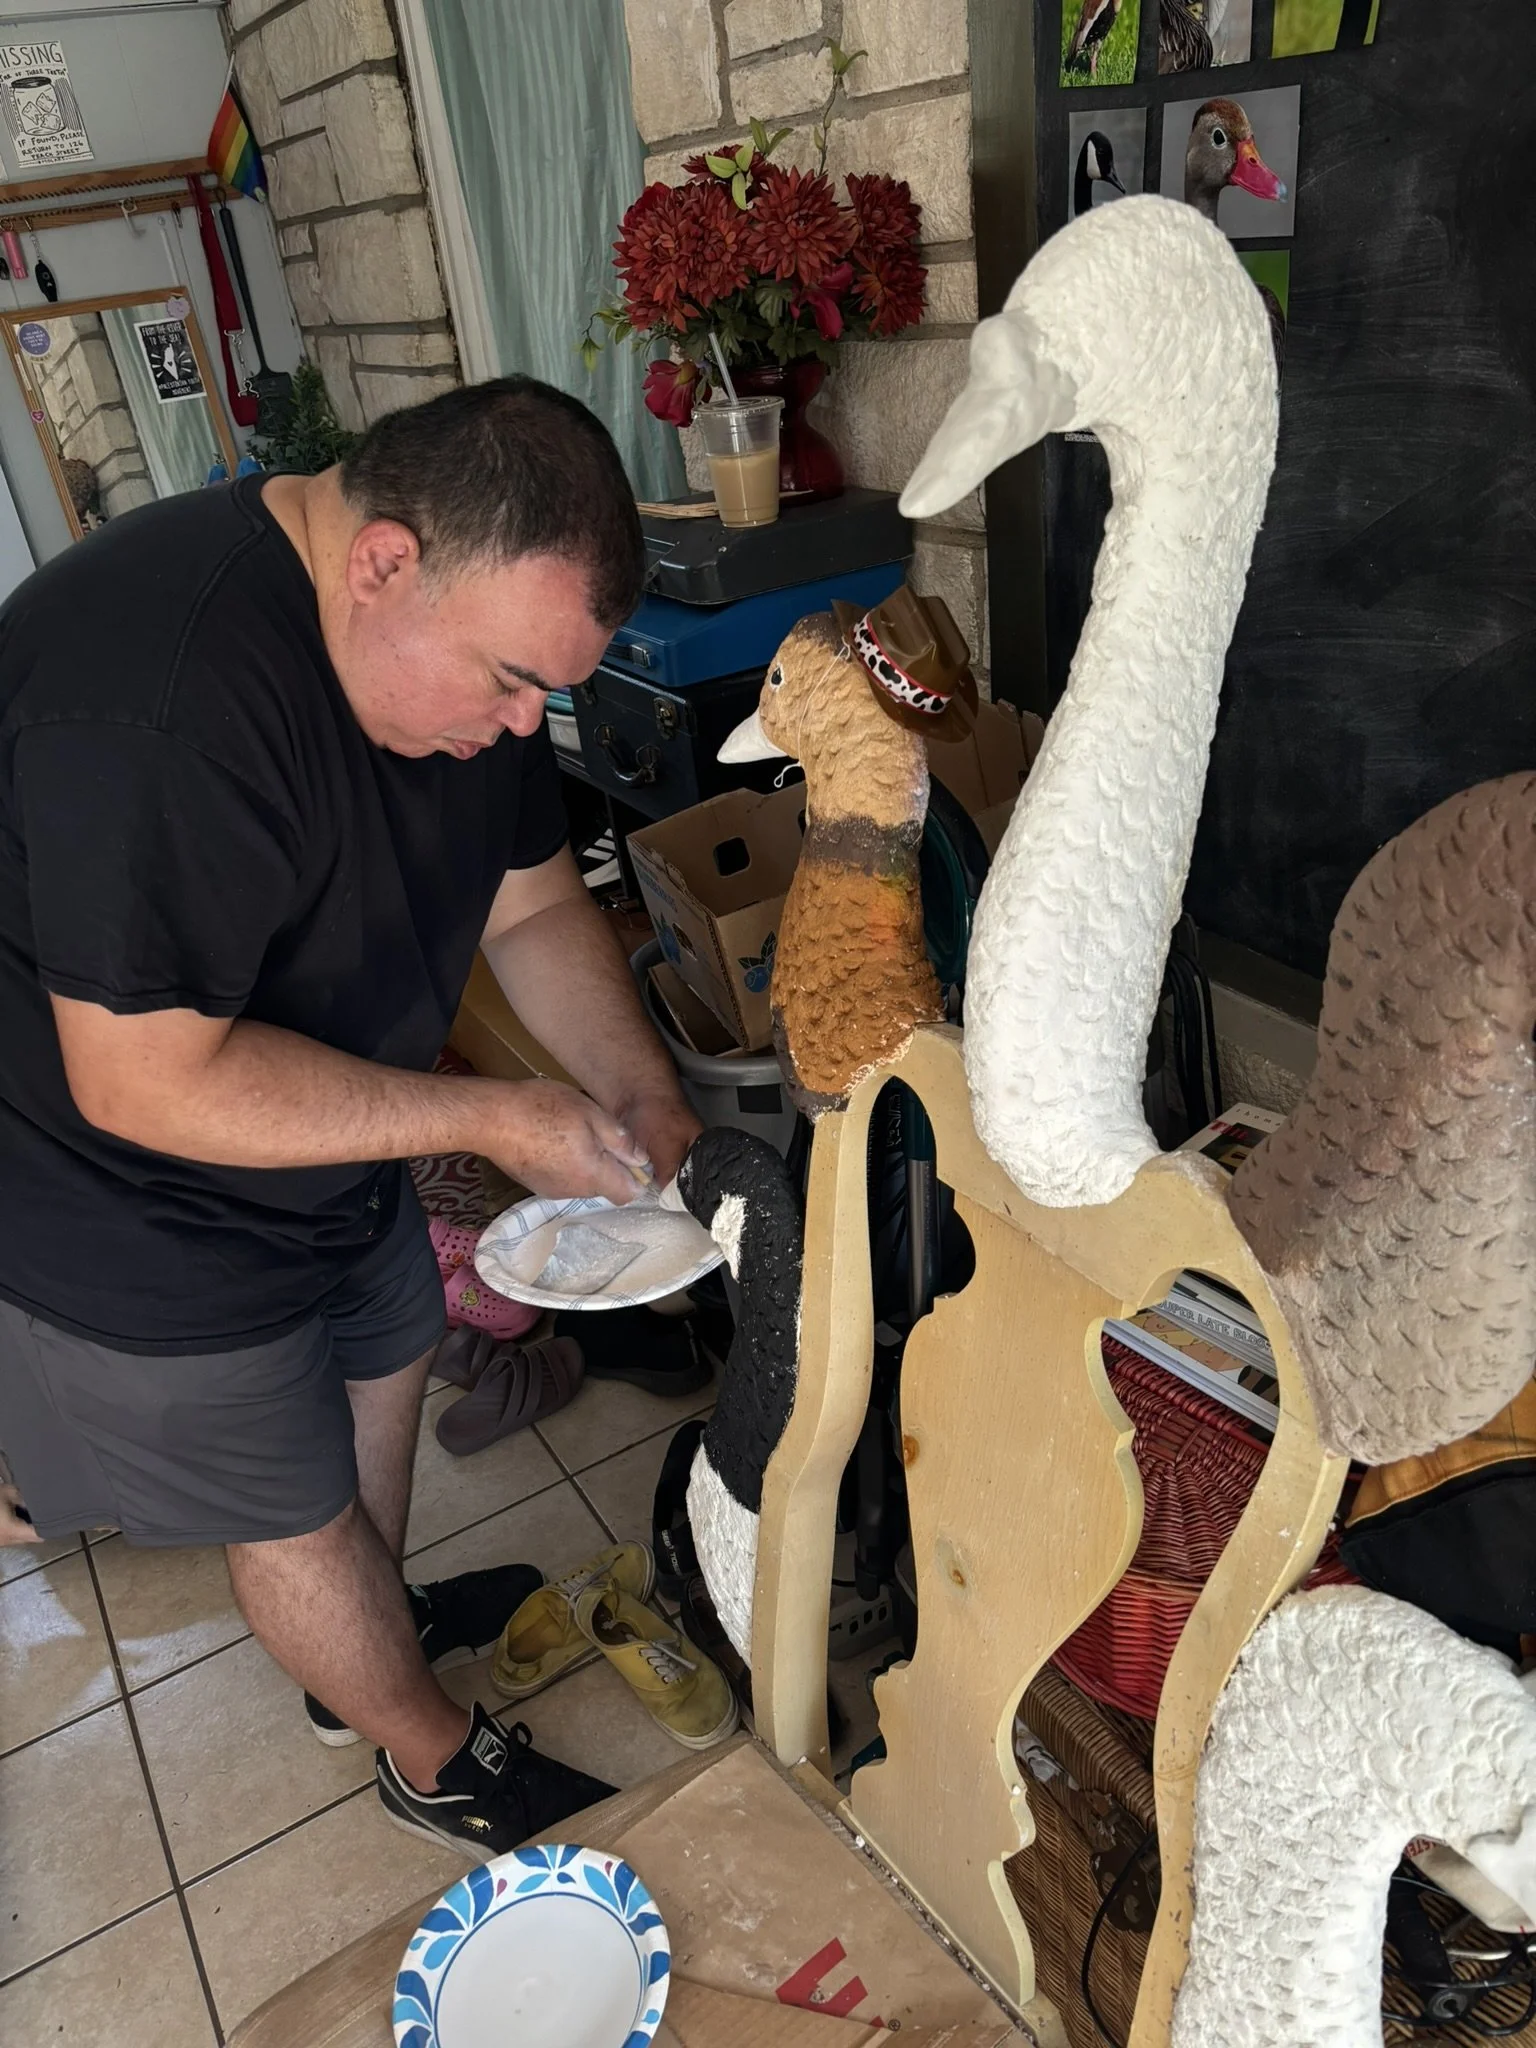

To attach air-dry clay to dried paper mache, you can use a dotting tool or even the end of a paintbrush to smear the part of the clay that’s touching the paper mache so it can grip it. You can then smooth it out using a wet brush. You can also use the wet brush to smooth out the clay from the eye so that you can get a nice round eye shape.
Nest and Eggs
What nobody tells you about art is that you have to give yourself time to make mistakes.
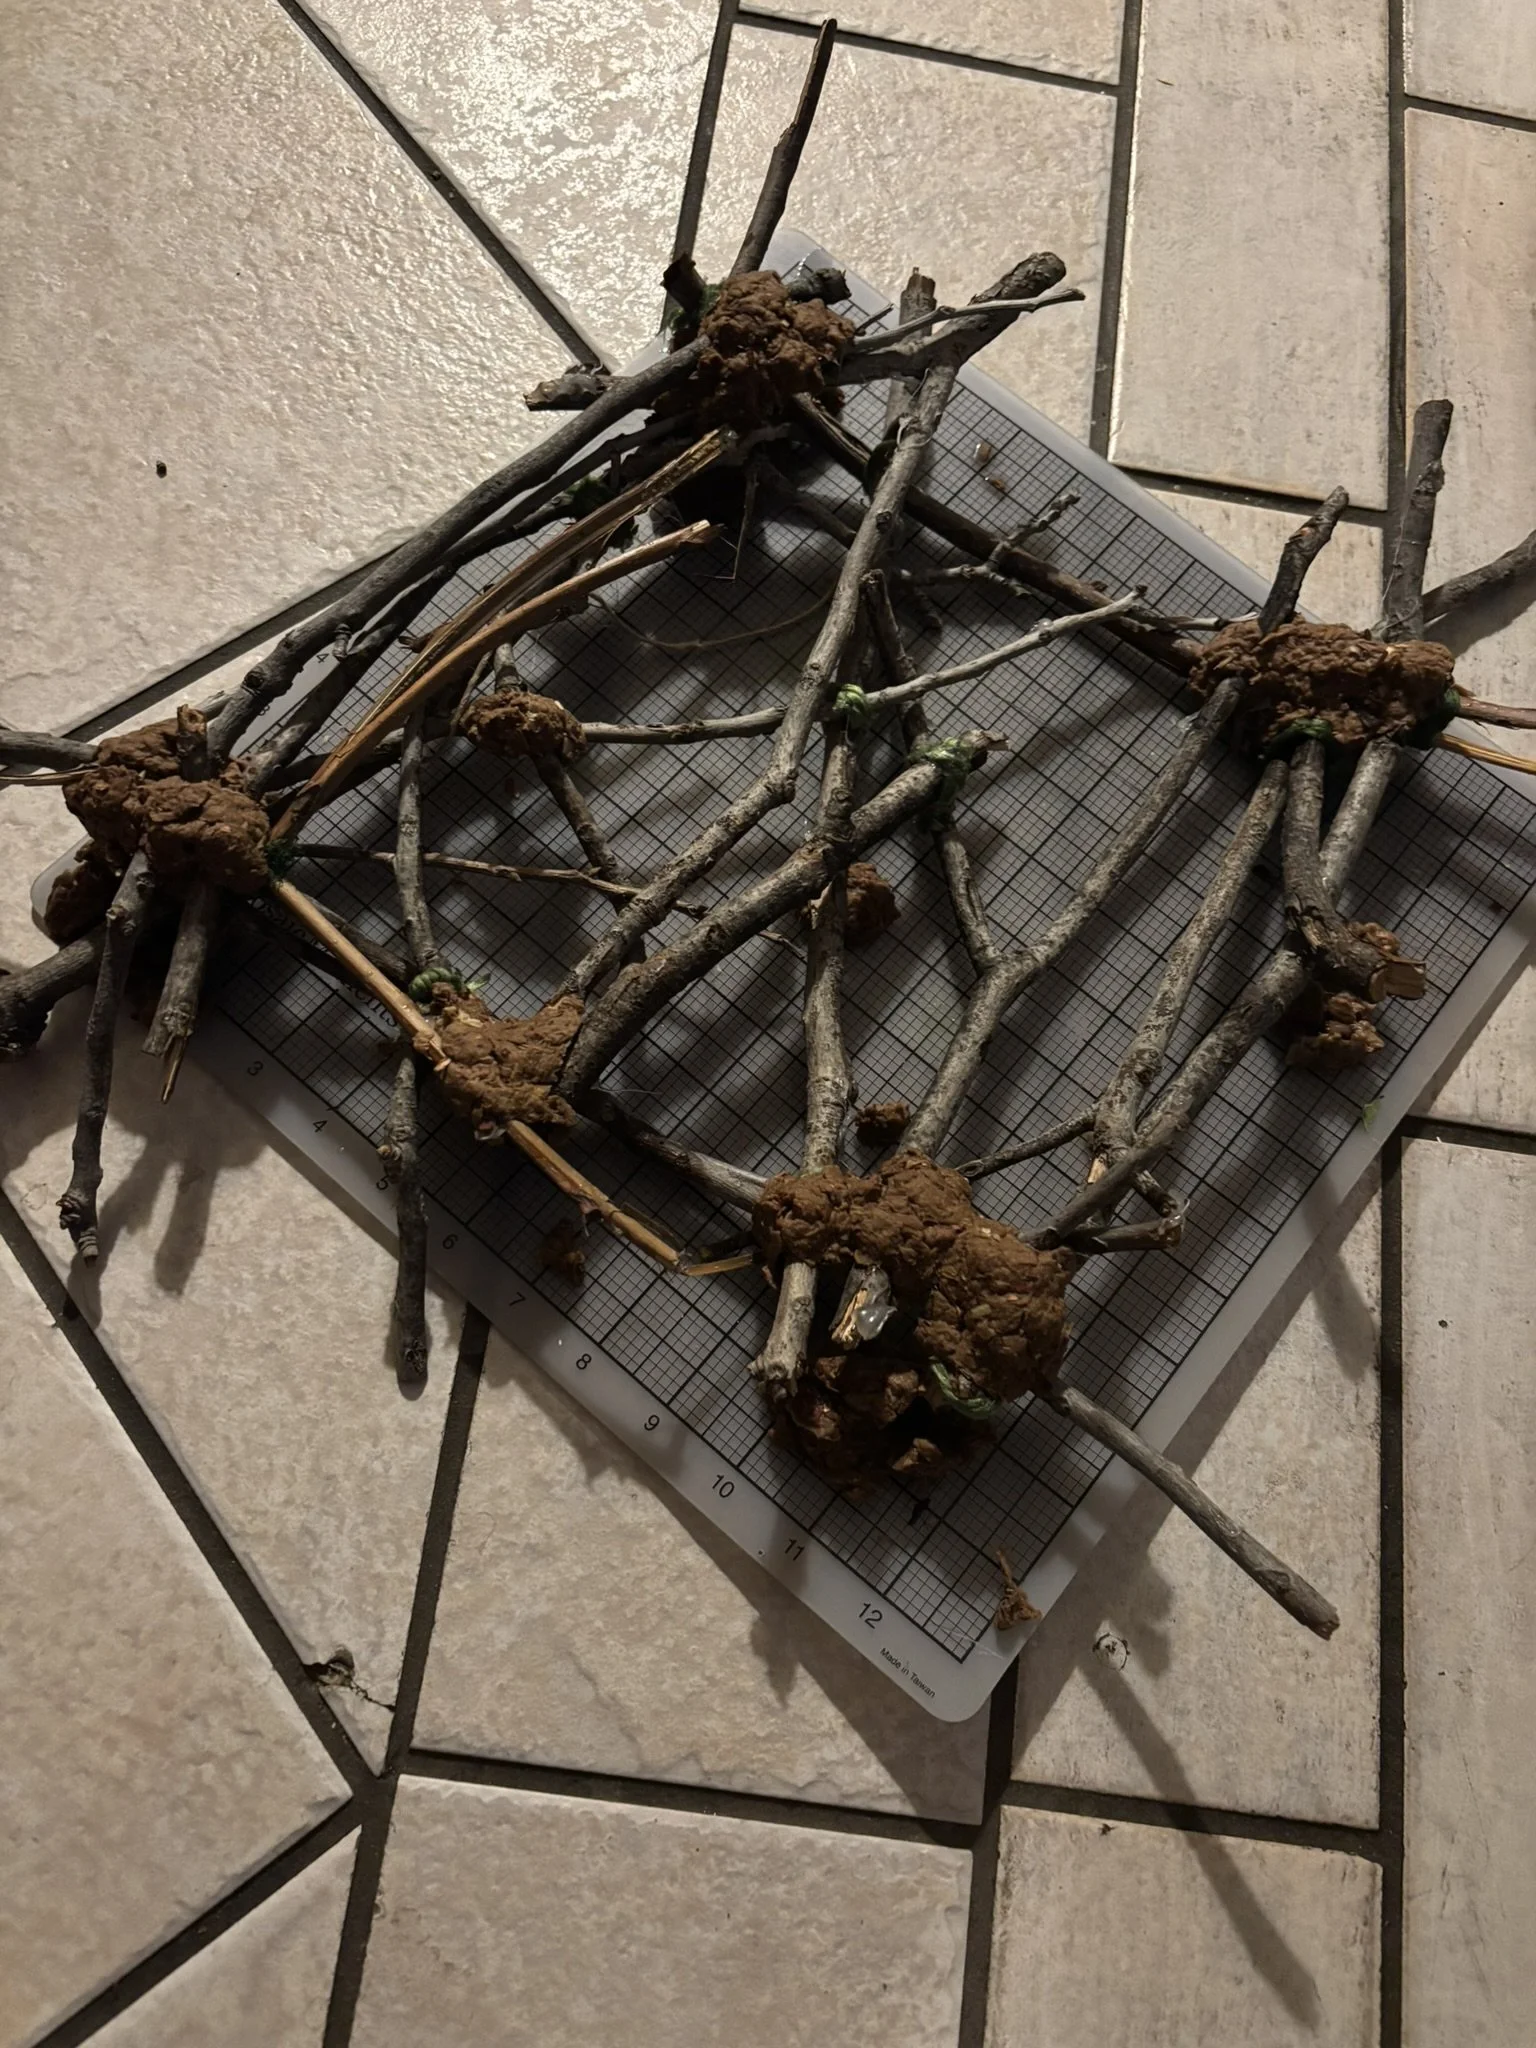
I thought it would be easy to weave some sticks together to form a nest but soon realized nest-making is not for the weak. The first nest I made fell apart completely when I tried to move it. My friend Tova rebuilt the nest, using yarn to tie the sticks together.
This was better than the first nest but still kind of wobbly. I tried to fix it by adding paper mache to help the nest keep its shape, but when I put it outside overnight to dry, it rained and the nest disintegrated again.

My lightbulb moment came when I was trying to find some floral wire to bind the sticks, but like a lot of things in my life, I could not find it (I have since found it). But my husband gave me a pack of mini zip ties. I used the zip ties to make the base structure and then started weaving in more sticks, adding zip ties as needed and by the end, I had a nest that did not fall apart. I used some hot glue and moss to cover up the zip ties. I then lined the nest with dried grass and fluffy bits of yarn to make a soft bed for our eggs.
The eggs were originally pill bugs I made out of paper mache but never finished for our bug tea party at Lil’ d speed bump. I put more of the sawdust paper mache pulp on them to make them egg shaped. When they dried, the texture of them was quite
crunchy, so I covered them with another layer of paper mache made from shredded copy paper that I over blitzed with my immersion blender for a smooth finish. We then painted them with acrylic paint and coffee to get various shades of brown, pink, and blue.
Feet
Like the heads, I made the feet by cutting out a piece of cardboard into the shape of a webbed duck foot. I used the chunky sawdust paper mache mix to form the toes, then added the smooth copy paper mache mix on the webbing in between.
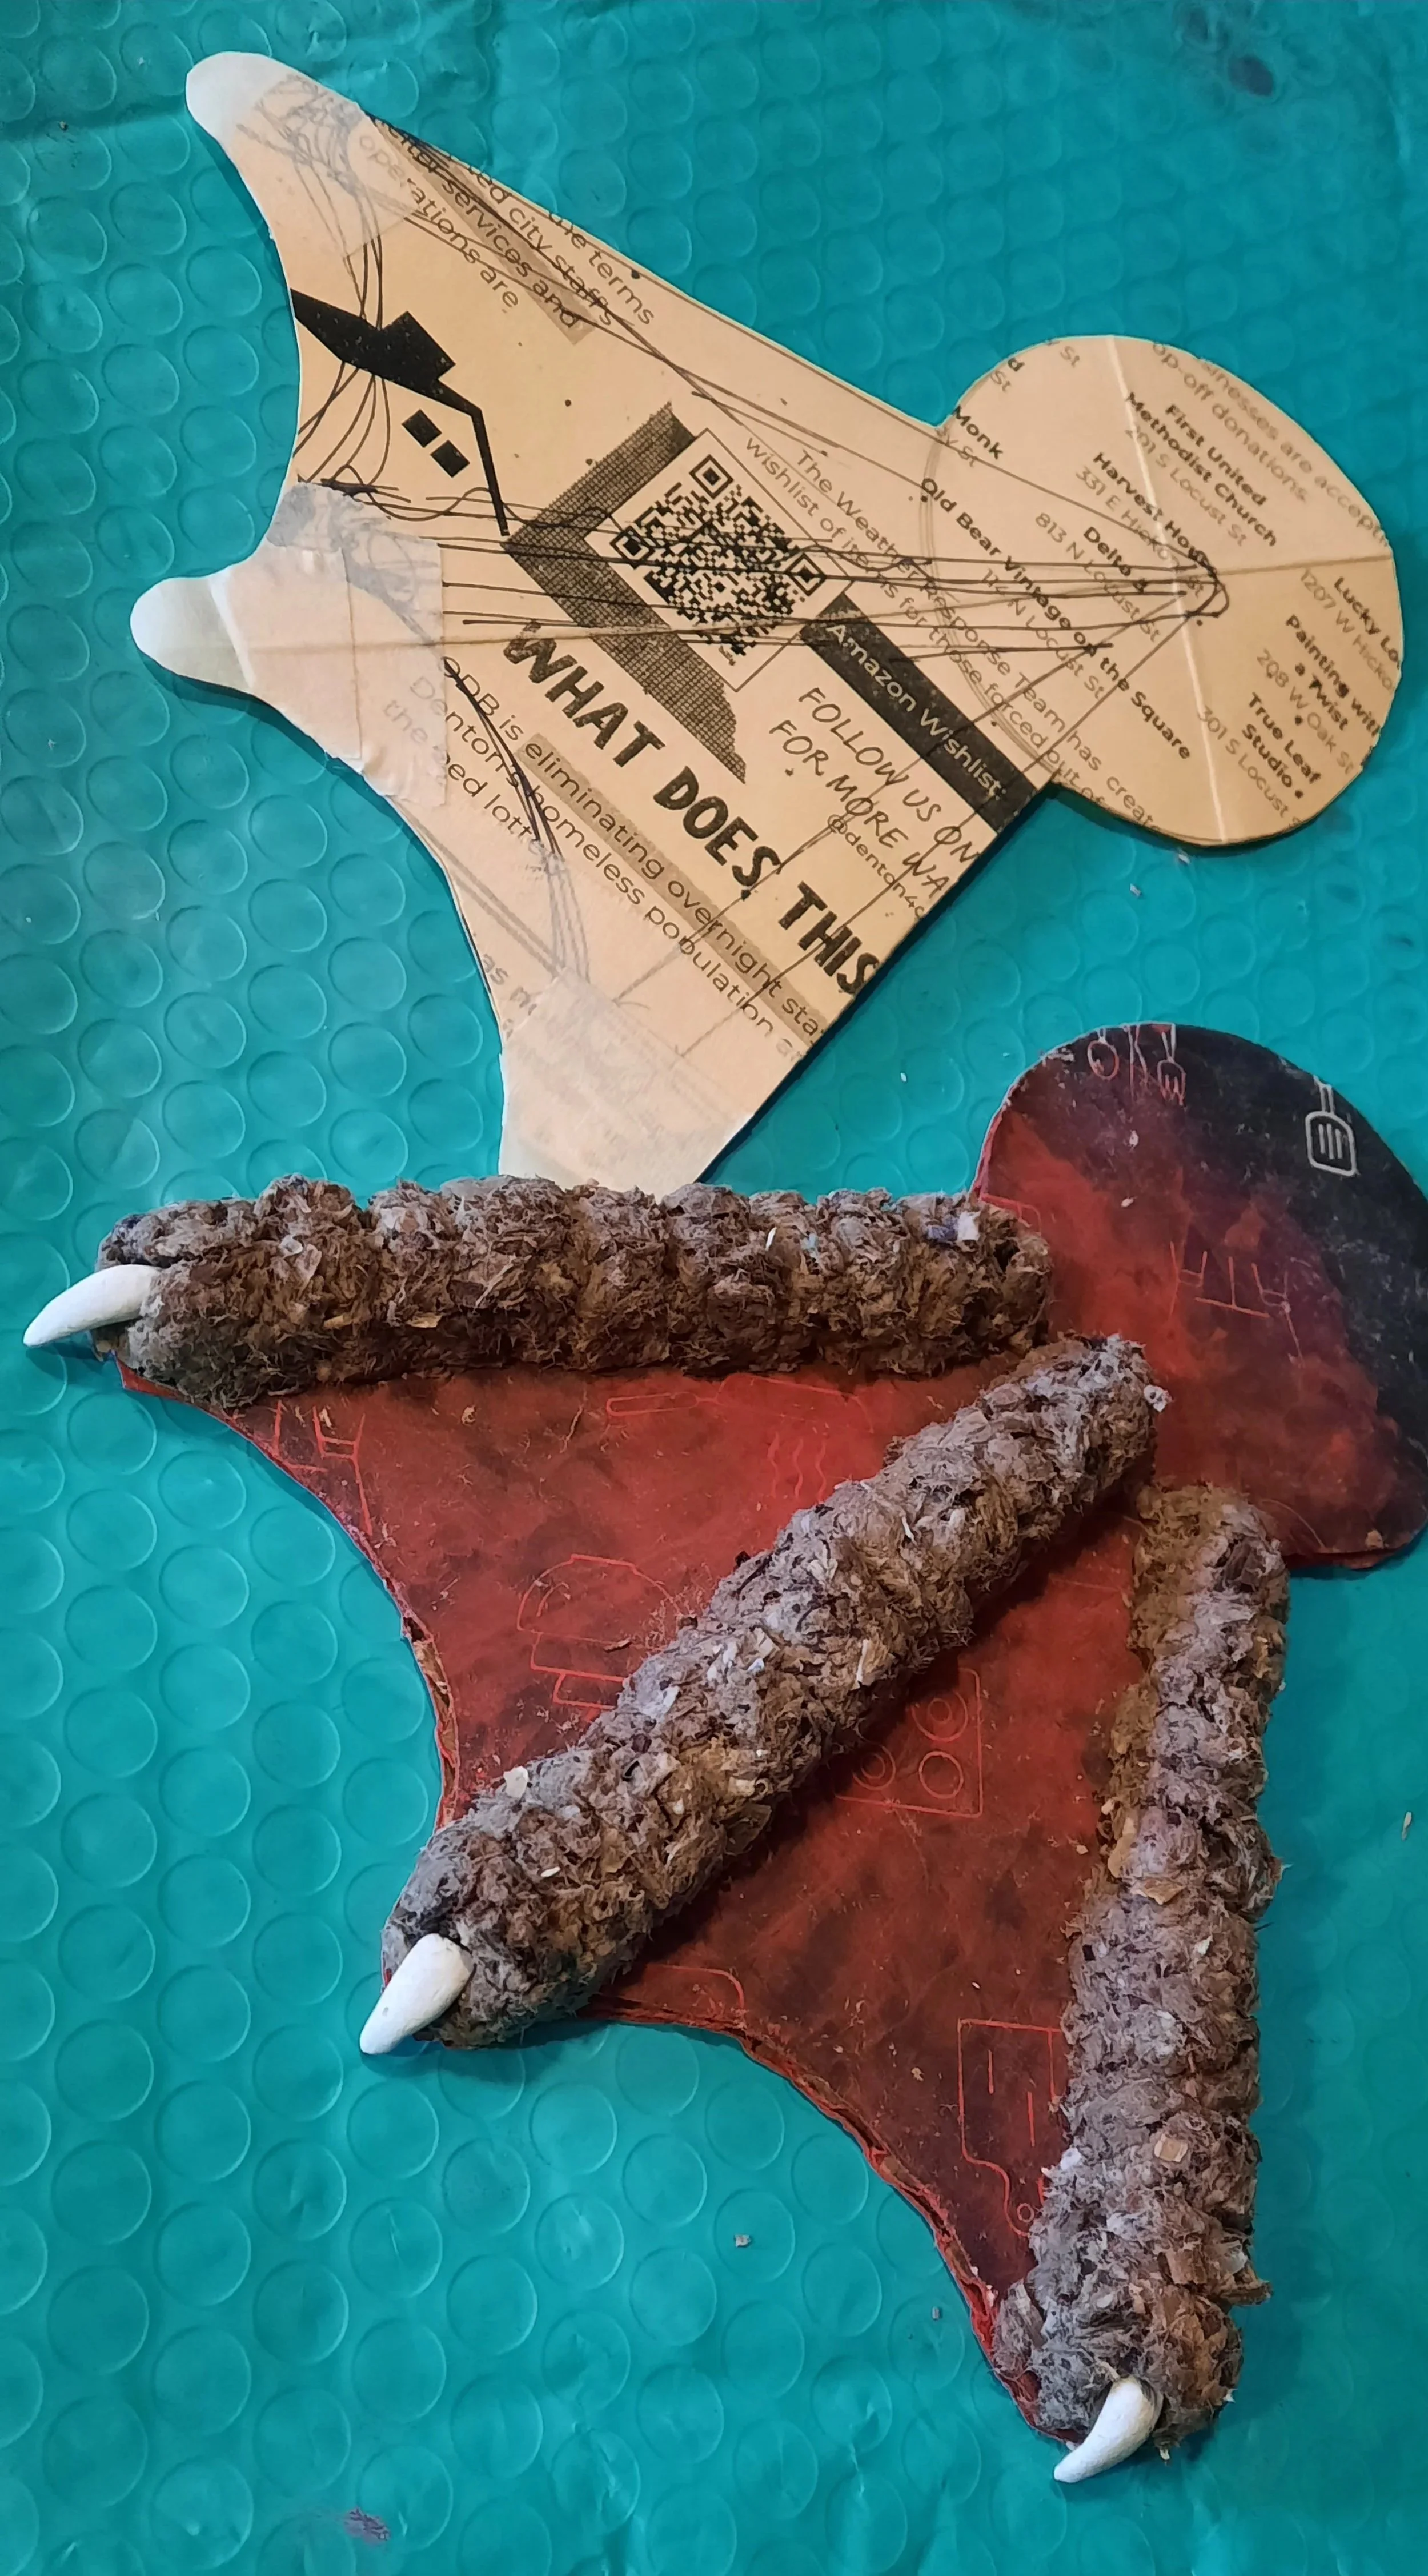
The toenails are an absolute disaster! No matter what I made them out of (air dry or polymerr clay) they would constantly break off because the feet are too big and people, me included, keep stepping on them by accident.
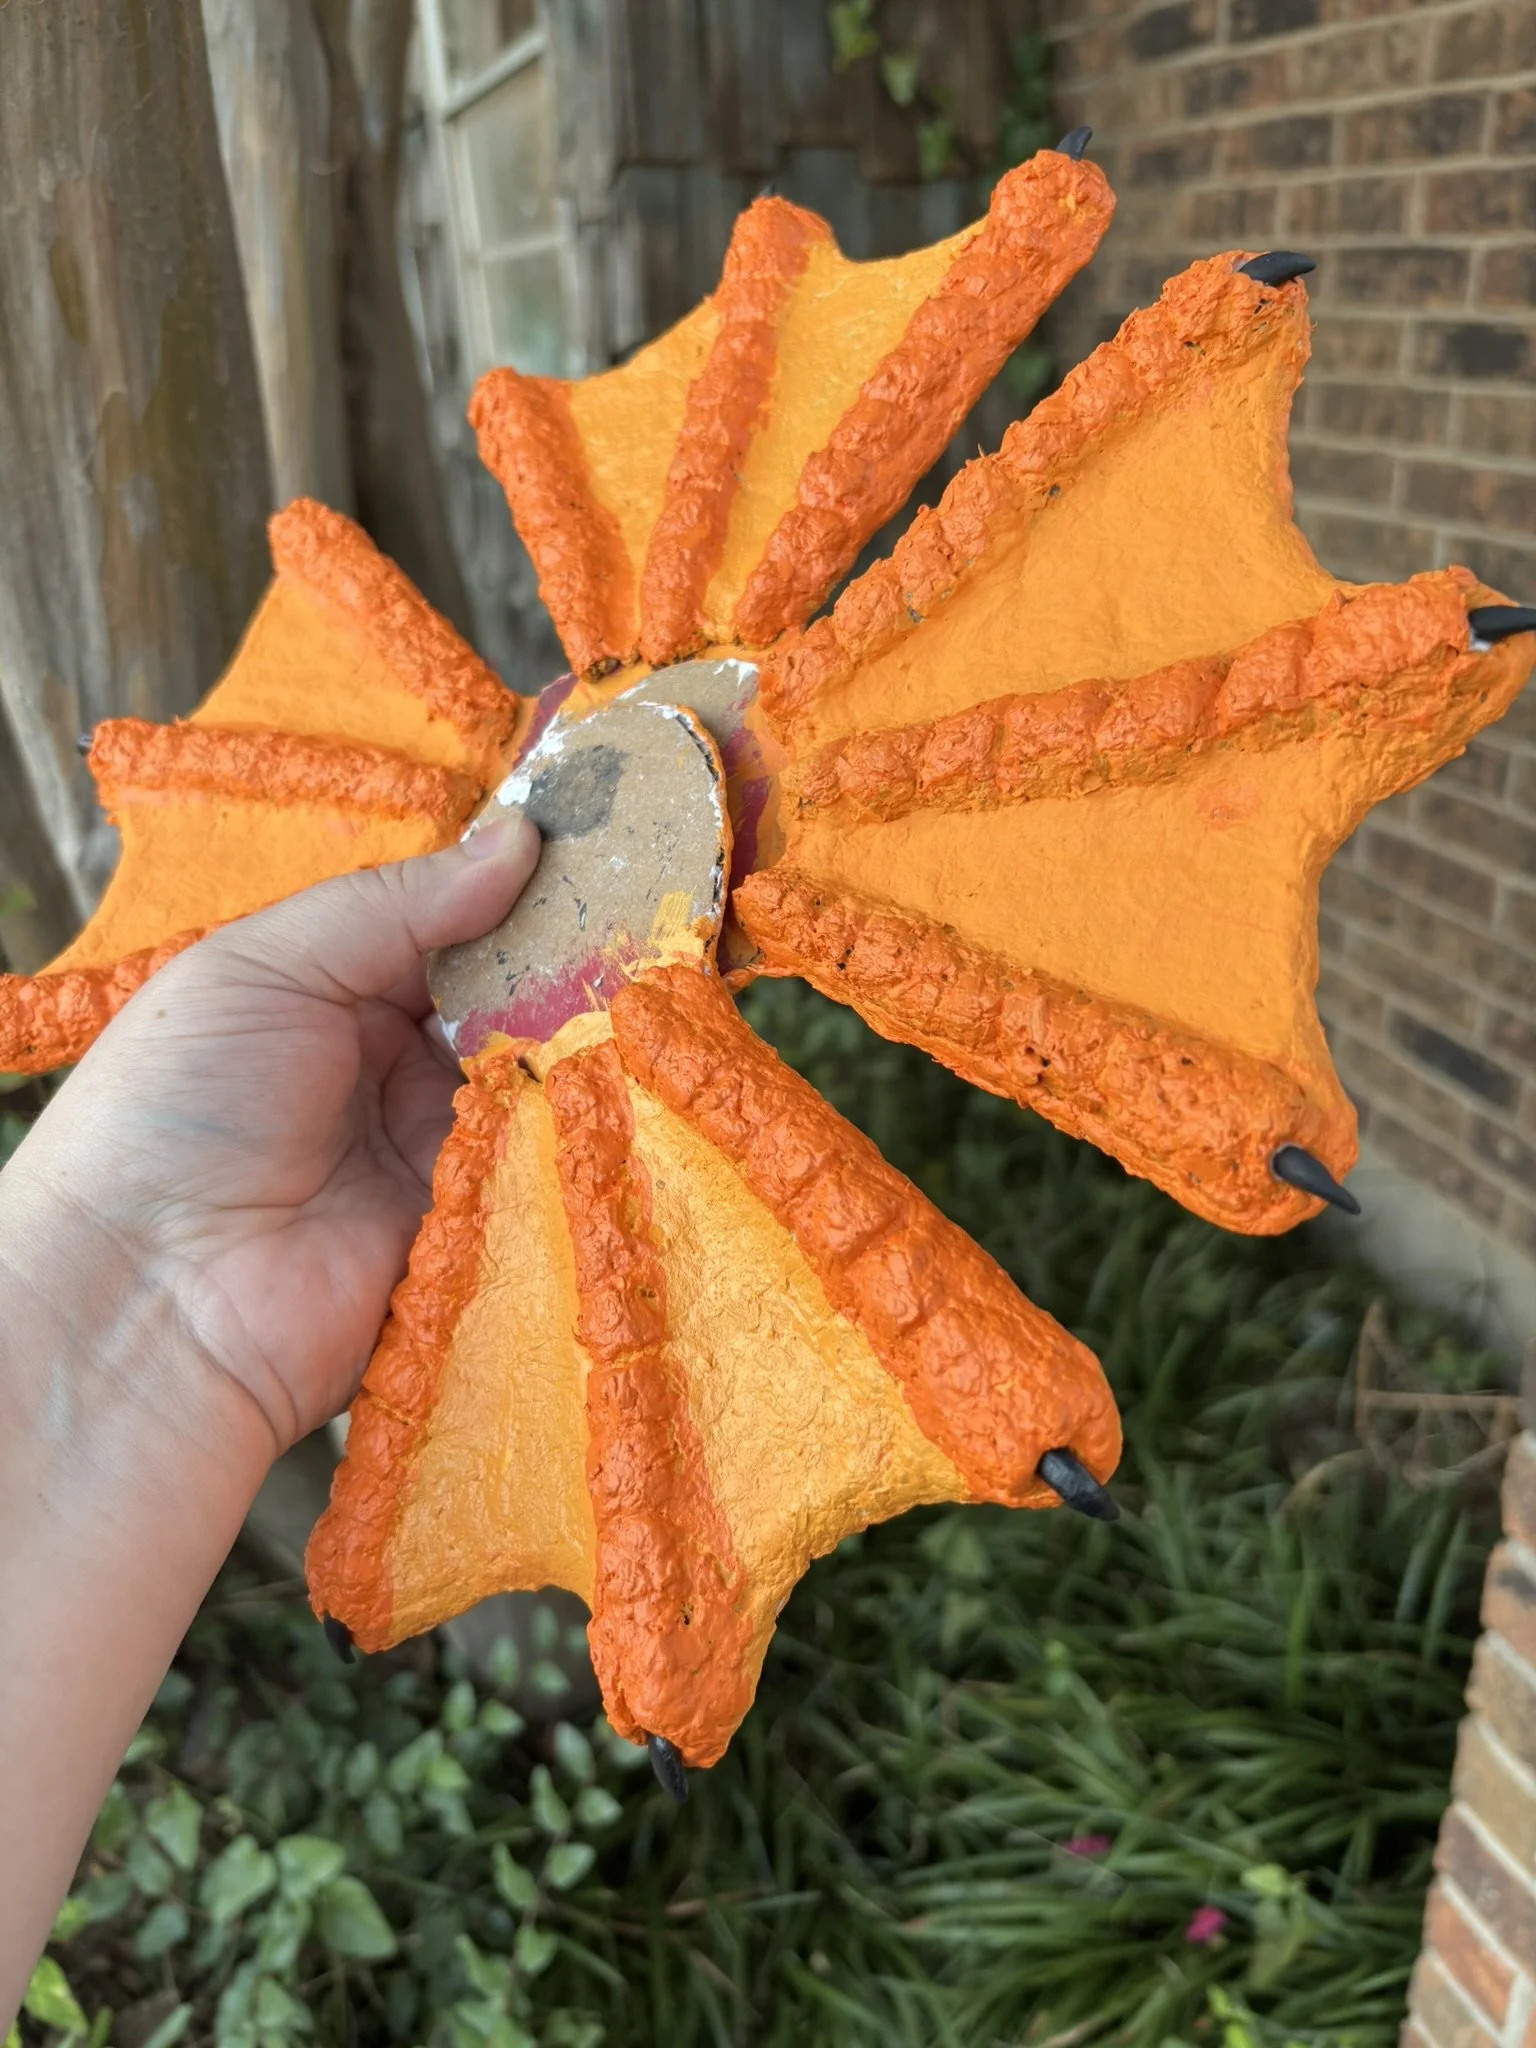
Wings
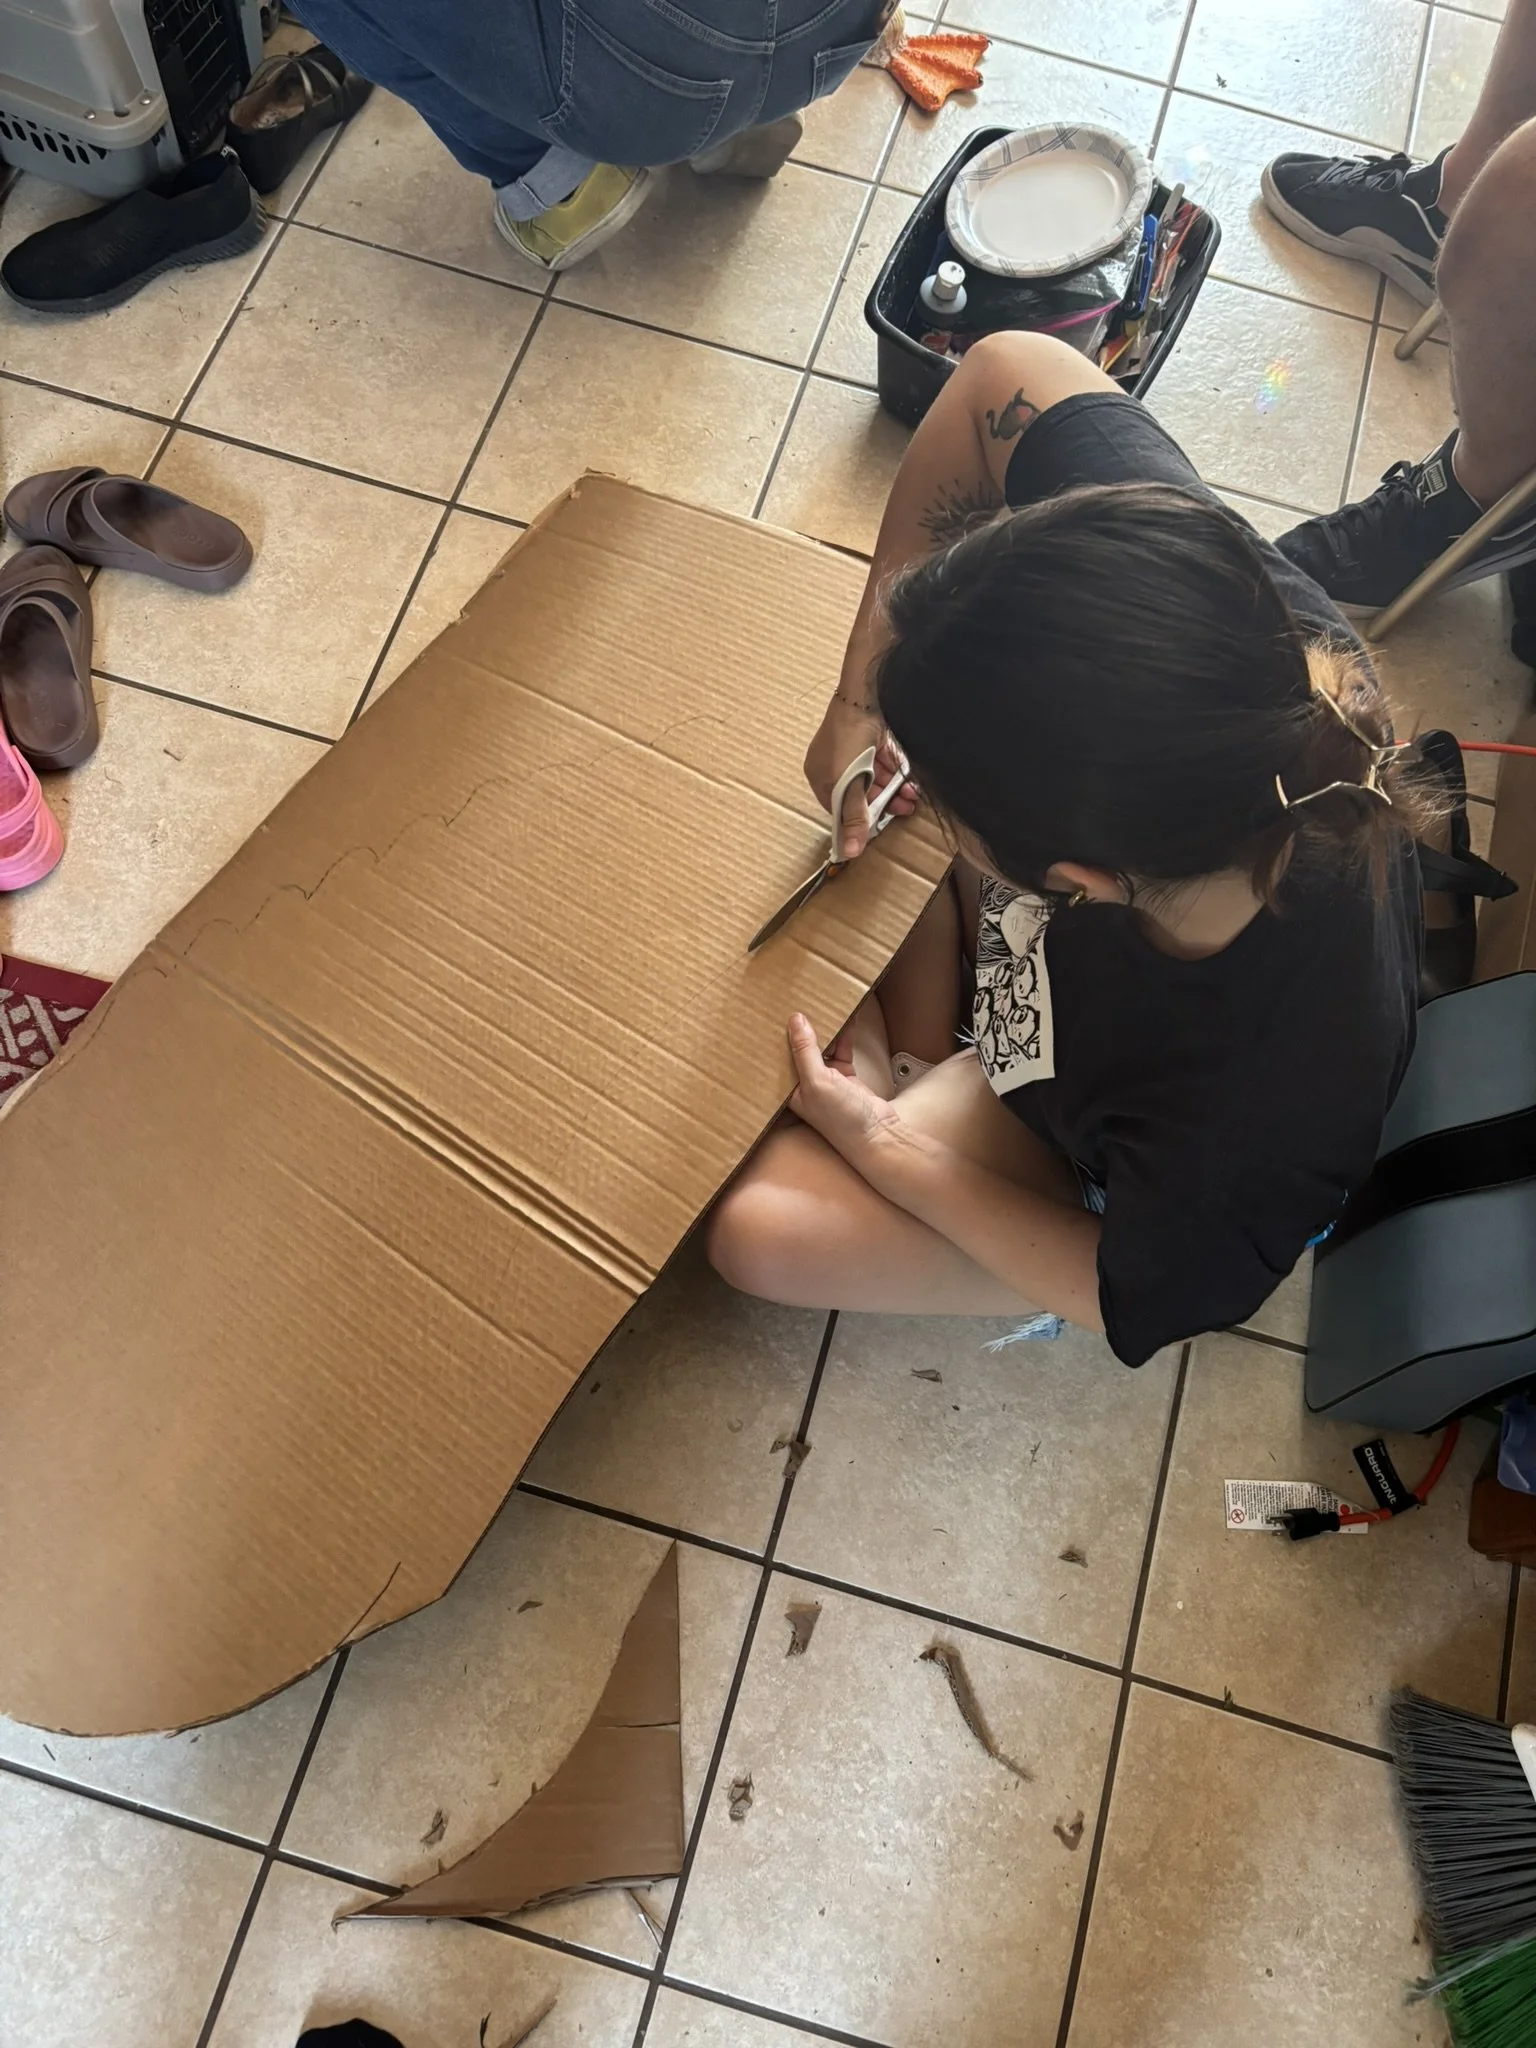
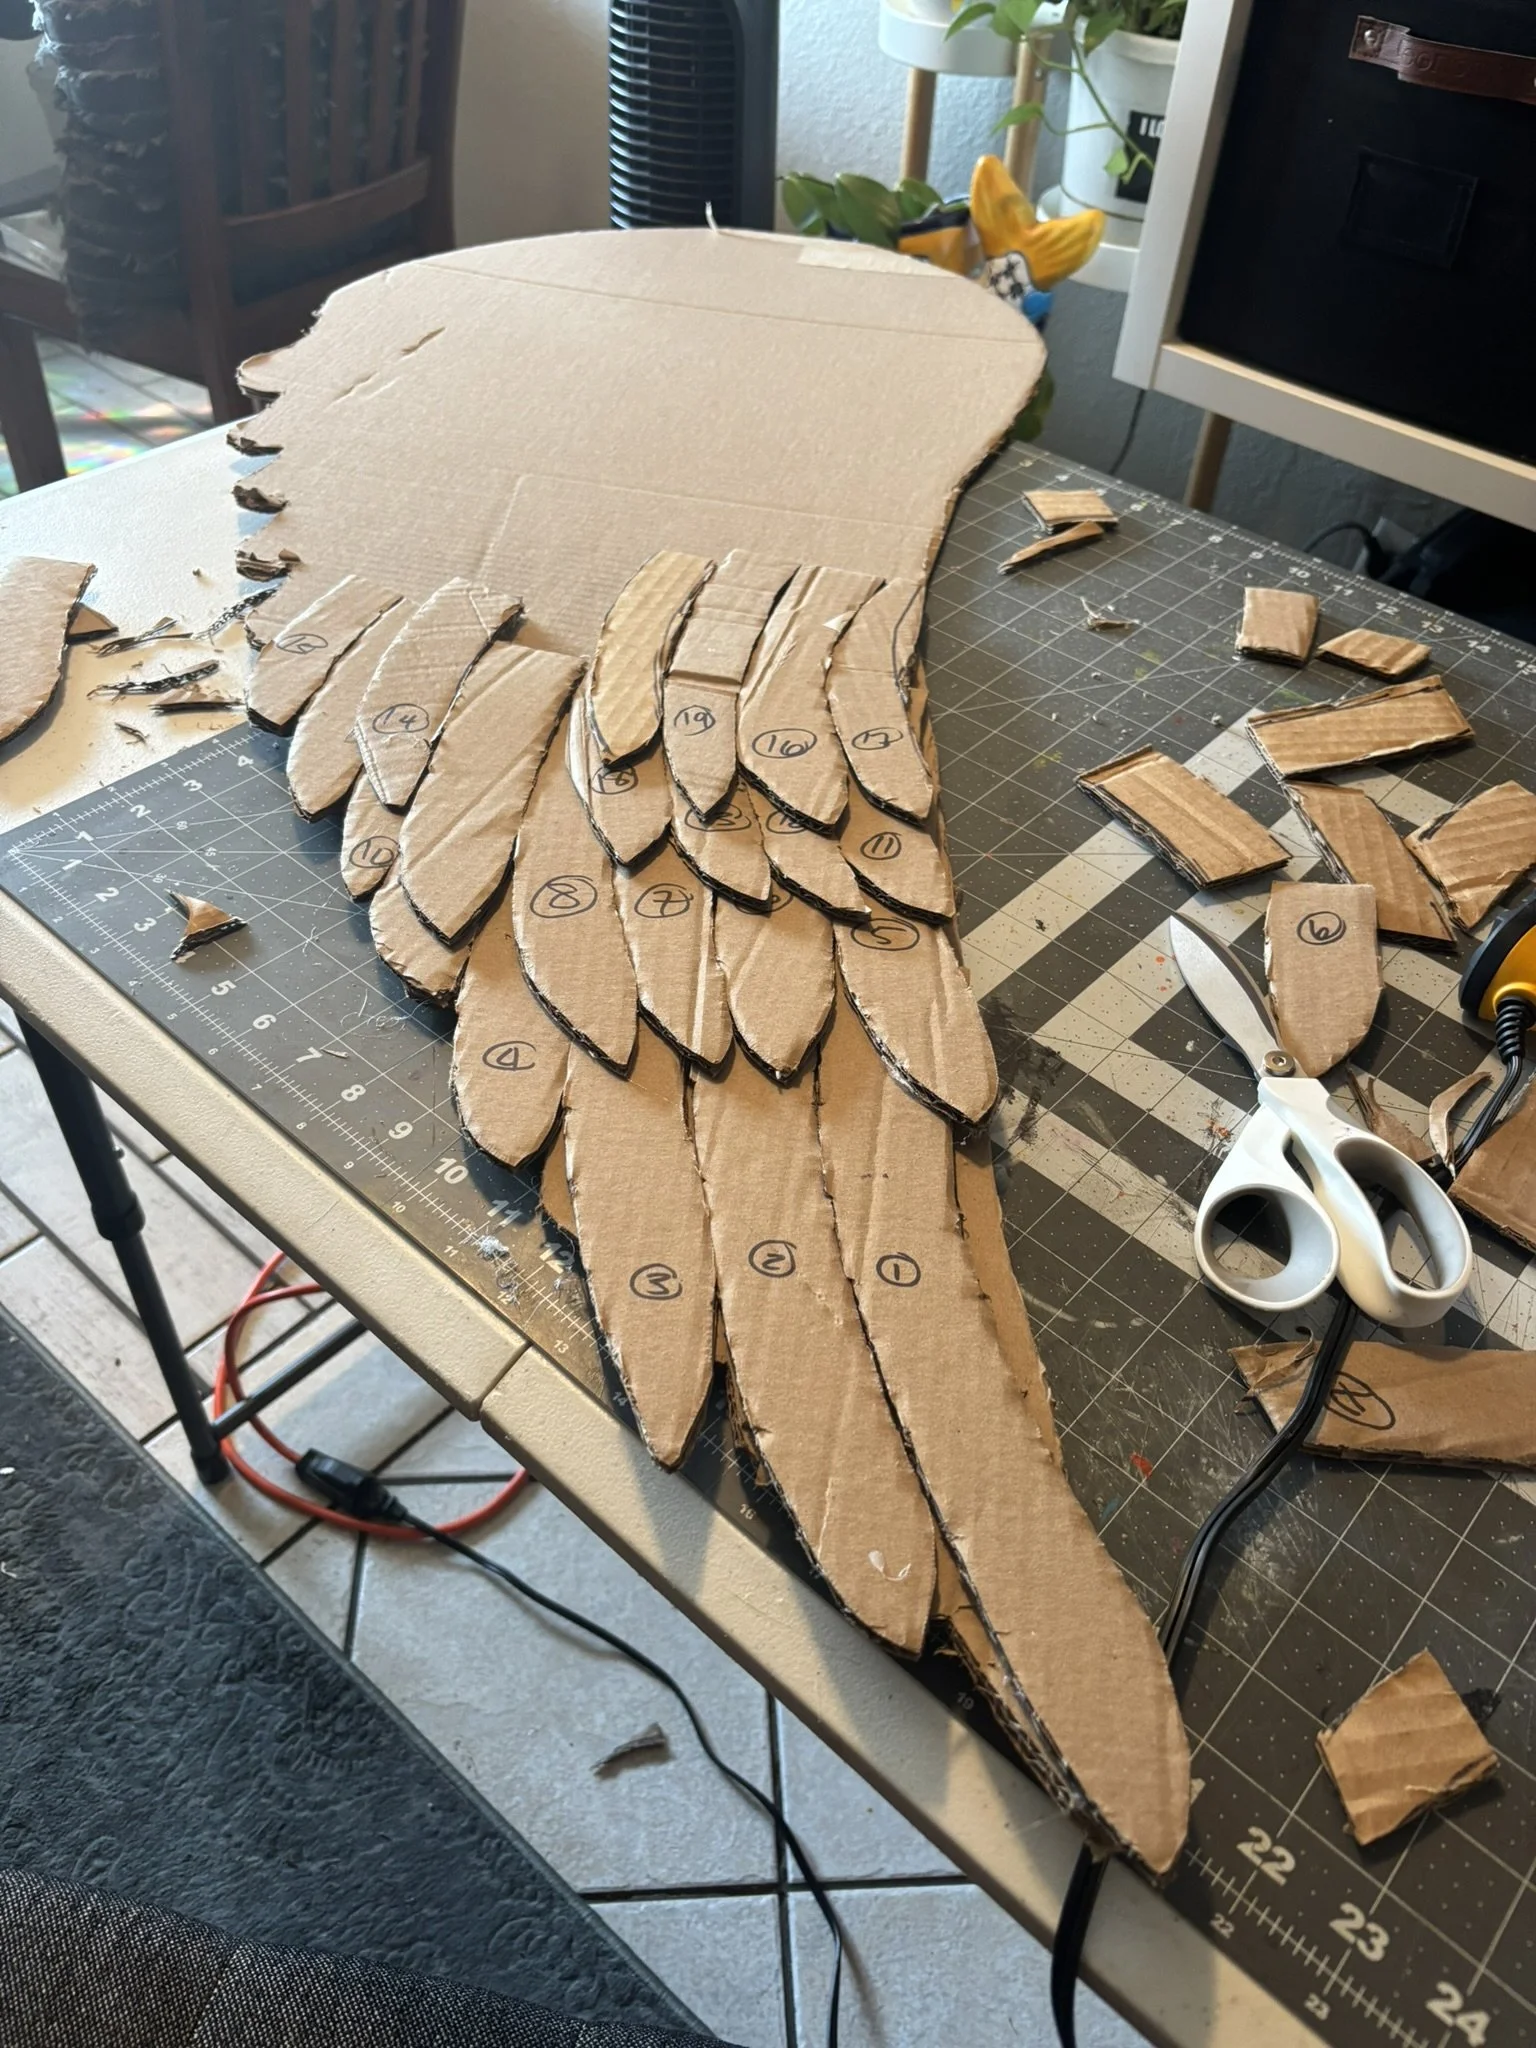
I used this lovely cardboard angel wing tutorial . Mia cut out the wing shapes from cardboard. Once again, my Fiskars saved the day and my hands as I cut out the feather shapes that I drew on the cardboard. Once I had all my feathers it was time to hot glue, starting from the bottom and working my way up. I was in the zone, gluing one feather after the next until I was finally done. A feeling of achievement washed over me. I set both wings on the floor only to realize with horror that I had made two left wings.
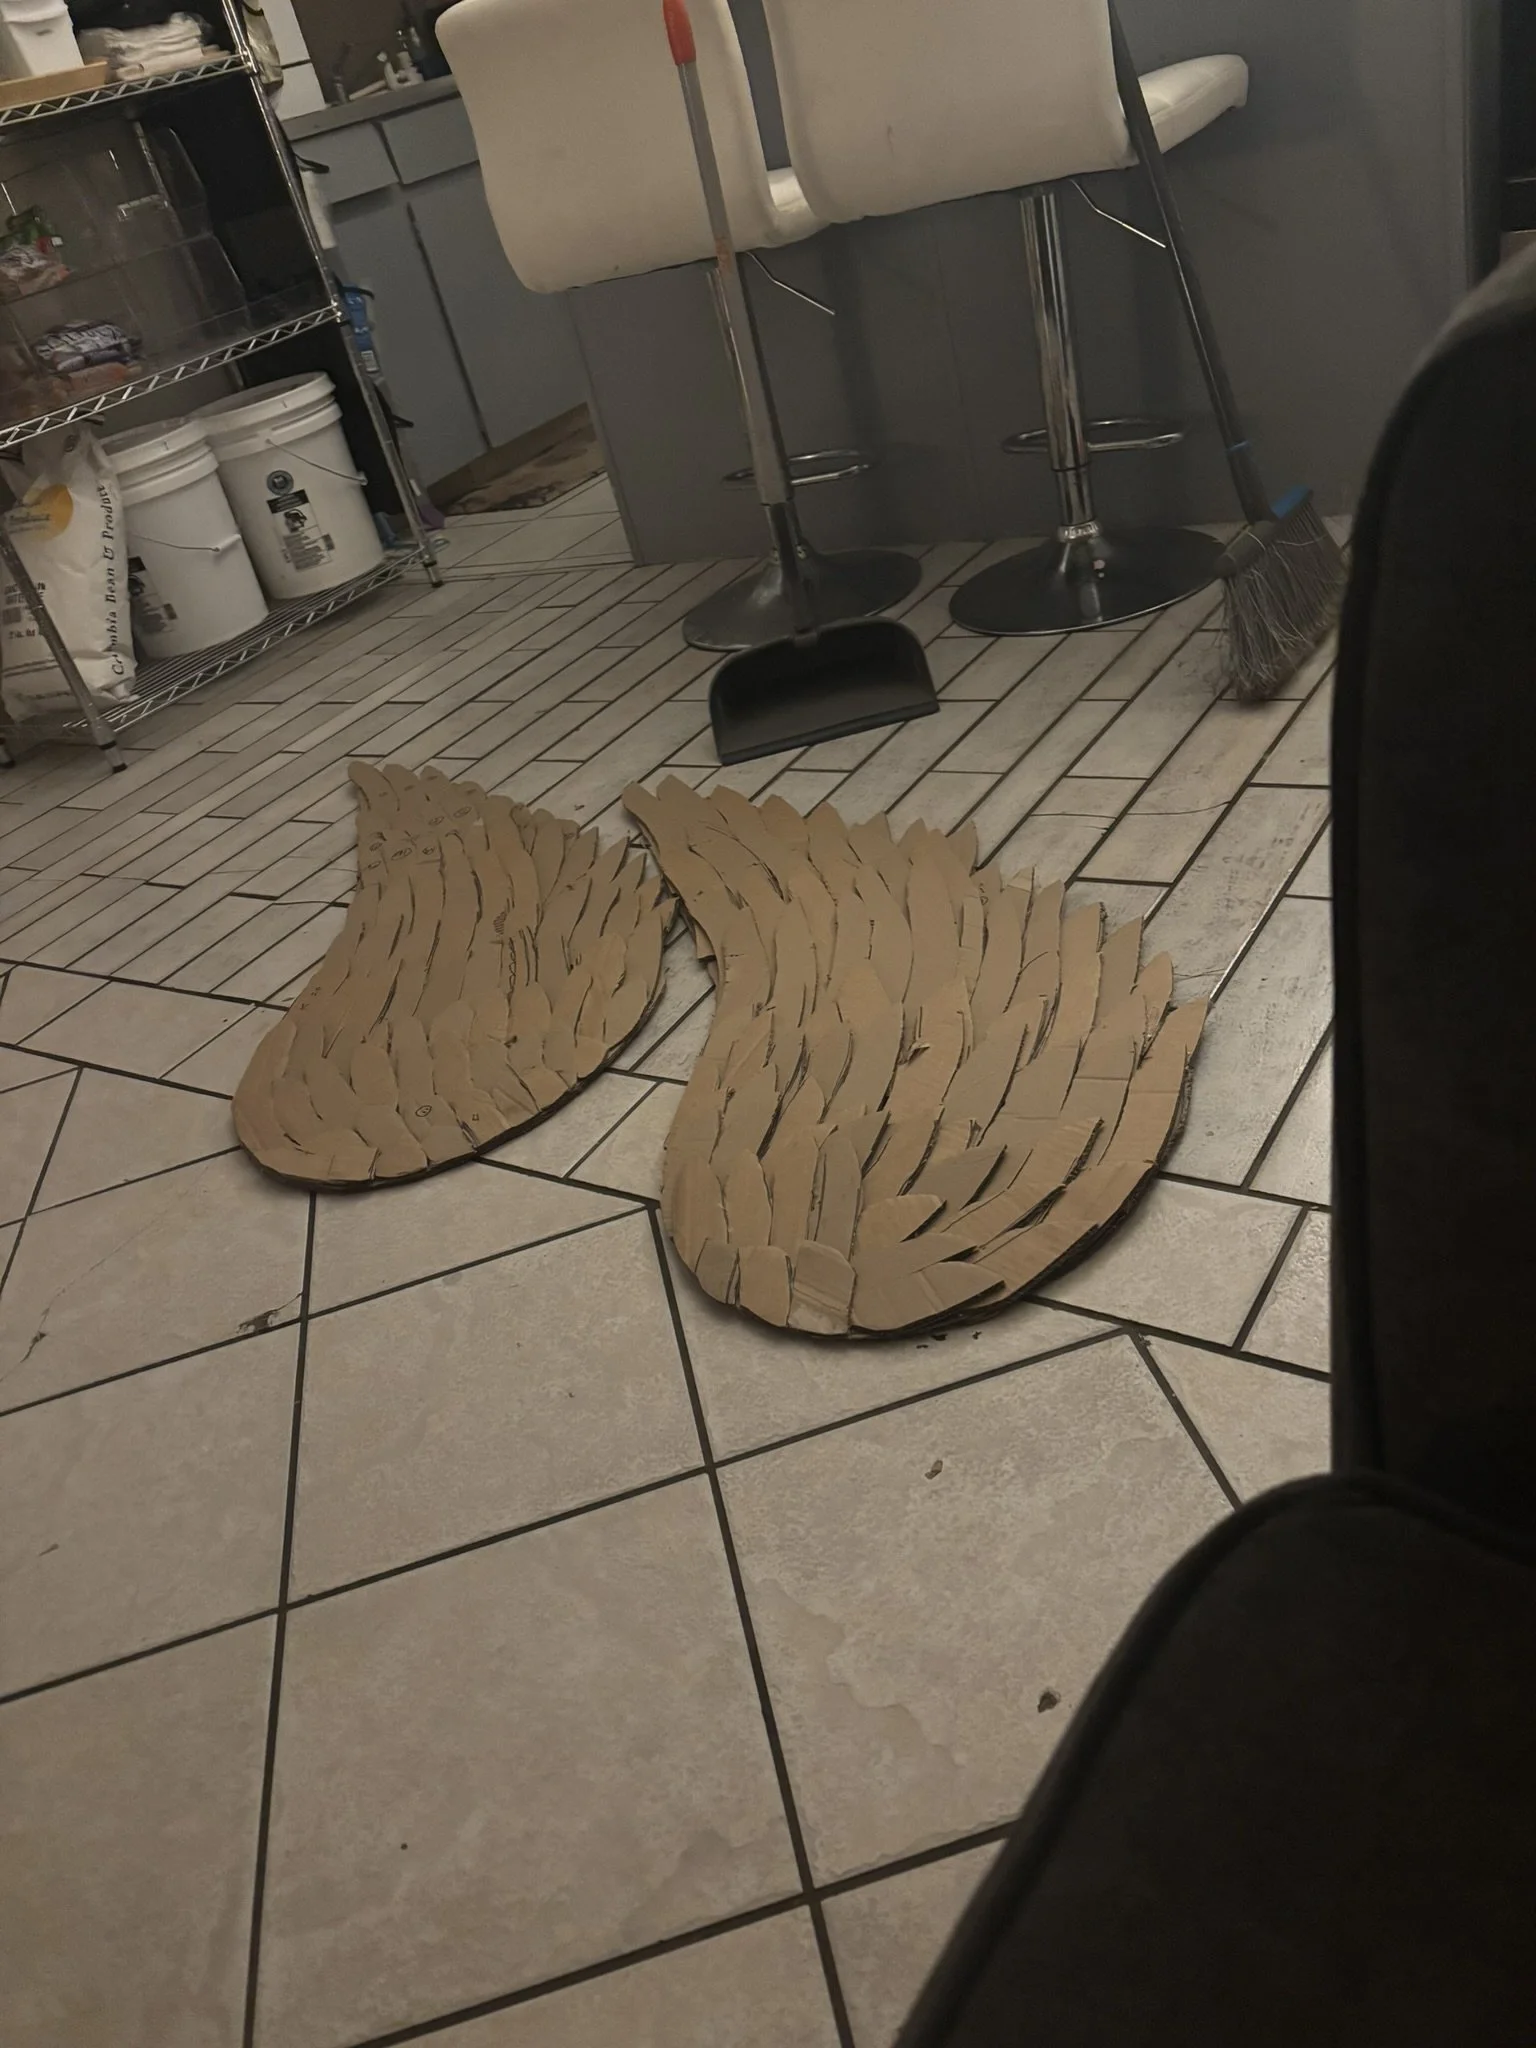
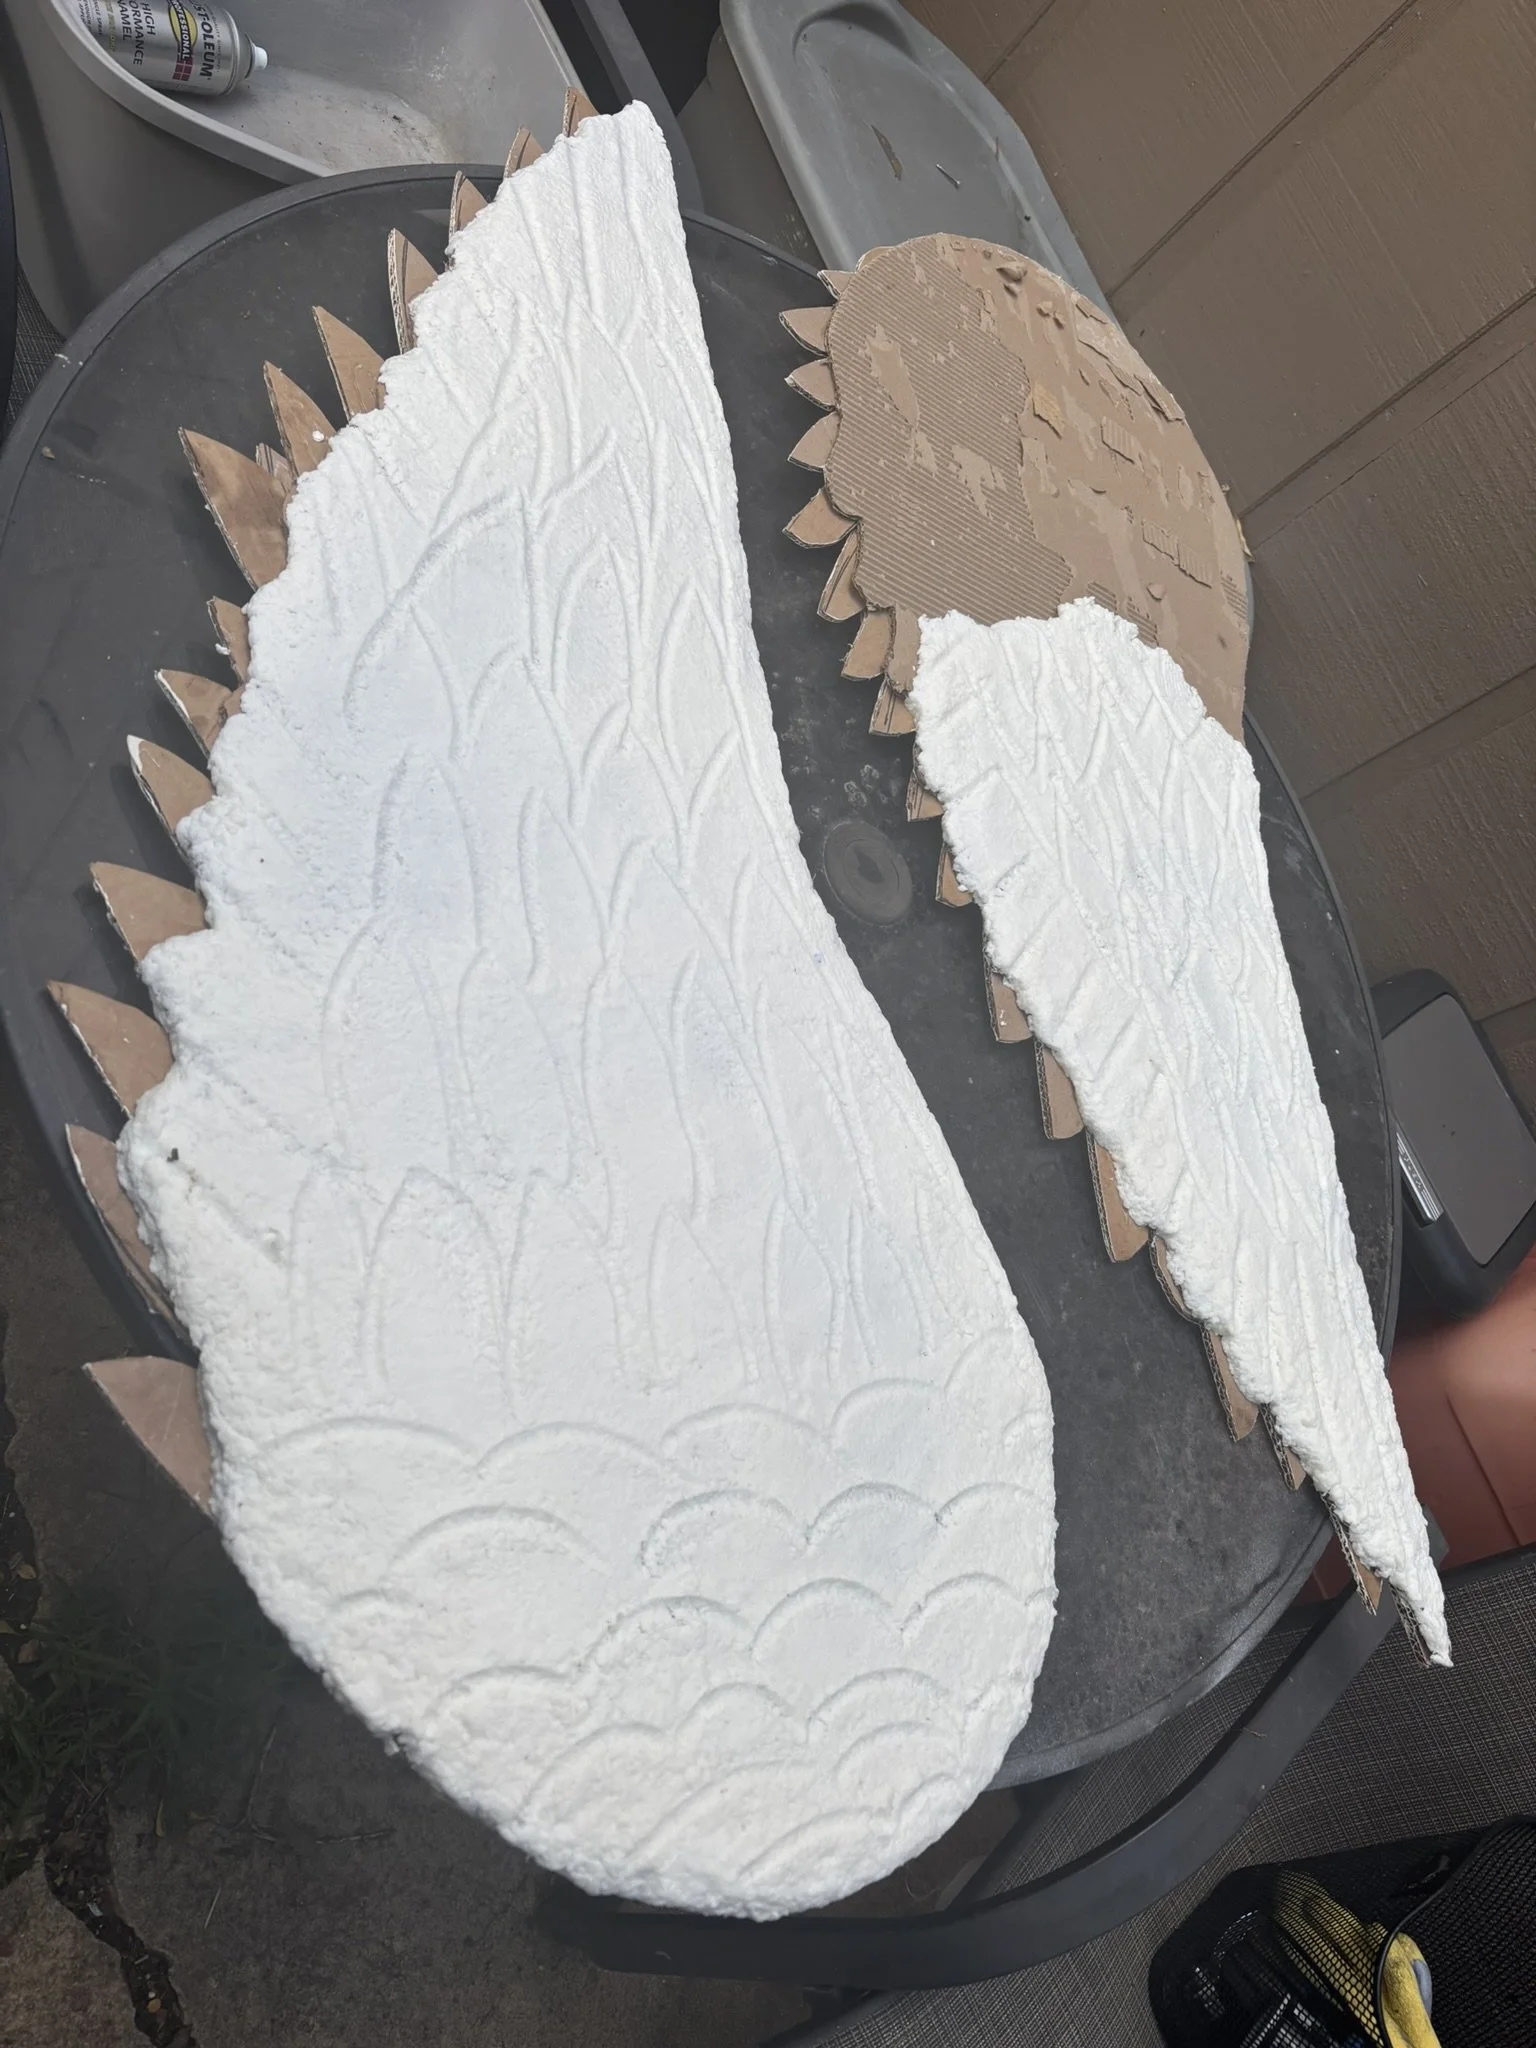
After a small meltdown, I tore the feathers off the wrong side and vowed to start again the next day. In the morning, I cut more feathers and glued them on the right side this time giving me a right and left wing when I was done. To finish the wings, I covered the backs with more of that toilet paper mache mixture and went at it with a spoon to make it look like feathers.
Reveal

Conclusion
Remember last year when I said “I should give myself 2-3 months to complete everything and avoid rushing towards the end”?
Well, I didn’t do that.
I started building the chair in August. The chair was due on the same weekend as the Denton Zine and Art Party. Between prepping for that and putting the finishing touches on the chair, I was spread too thin, like too little butter on too much toast.
I breathed a sigh of relief when it was over. I thought I got away with it. I could rest now and pick up the pieces. But instead, I got a respiratory infection and was laid up for a week. The body really does keep the score, and it won’t let me forget it.
So what did I learn this time around? I need to start earlier. I need to develop a regular art practice.
Right now, I am jump started by short-term deadlines, but this puts too much pressure on me and the outcome is not always my best work. Can you imagine if I really gave myself time to make what’s in my head?
If this is going to be one of my yearly projects, I need to plot out the design, material collection and build months in advance. Next year I would like to start building in July and hopefully my body will thank me.
